Aquarium and Pond UV Sterilizers
TMC Vecton, Titan, Advantage-Highest Output Category A- Level 2 Capable
Only Full Service Authorized Seller of the TMC Vecton UV in USA
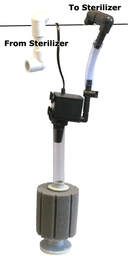
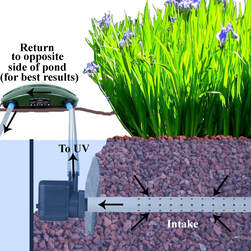
Internal UV Pump Filters
TMC Vecton, Titan, Advantage-Highest Output Category A- Level 2 Capable
Only Full Service Authorized Seller of the TMC Vecton UV in USA
Internal UV Pump Filters
TMC UVc Clarifier Sterilizers
Please note we're the full-service authorized dealer of TMC. We have been selling these UVs for decades, NOT just months or a couple years. We fully inspect ALL UVs prior to shipping. And we have the full line of parts too.
We also handle full warranties and repairs, with free service from AAP for the life of the unit. Just sent it to us. We'll repair it and only cost is shipping and parts.
Why purchase elsewhere to save a few dollars (if any)
We also handle full warranties and repairs, with free service from AAP for the life of the unit. Just sent it to us. We'll repair it and only cost is shipping and parts.
Why purchase elsewhere to save a few dollars (if any)
- The highest dwell/exposure time ultraviolet sterilizer clarifier.
- The BEST construction in a market flooded with low quality units found in Google searches.
- For pond green water control & disease control. Including large ponds UVs.
- For aquariums, capable of Level 1 & 2 Sterilization.
- Quartz sleeve, sturdy construction, excellent parts availability.
- HO (high output) straight tube professional UV sterilizers with maximum mW/cm2 UVC exposure.
- If purchased from AAP, LIFETIME FREE service, only parts and return shipping charged
Evolution Aqua UVc Clarifier Sterilizers
AAP Compact UVc Sterilizers
Internal UVc Pump Filter
UVc Sterilizer Parts
UVc Ballast & Starters
UVc Lamps & Quartz Sleeve
Tips & Troubleshooting
• While we check each unit prior to shipping, we recommend plugging in and checking the unit in a dark location, prior to connection.
As well always check for any breakage of the sleeve from rough shipping prior to set up (we check and repackage ALL UVs prior to shipping, but sometimes breakage happens, especially if Economy Shipping is used)
The UV lamps can easily be checked by looking at the hose-tails or the soft end caps of the larger UVs for a blue glow. With the 15 & 25 Watt Pond Advantage when used in bright daylight, removing the two screws allows for more easy viewing to double check lamp function during regular maintenance.
Please note that the metal solder ball is typical of HO Phillips UV Lamps used in these TMC UVs.
• The TMC Vecton & Advantage UVs have very "soft" connecting Lamp Contacts at each end of the UV Bulb/Lamp for ease of service or bulb change. Because of this these easily can be disconnected when installing, moving, or shipping these UVs (although EVERY TMC is carefully checked by us and then repacked BETTER prior to shipping).
With the 110 Watt PRO UV, BOTH lamps MUST be connected or the UV will not light in either lamp
If your UV fails to come on, or takes a few times being plugged in to light, our experience with 1000s of these units has found that 95%+ of the time these Lamp Contacts are not securely connected to the lamp pins (or the wires have been partly pulled from the ballast). With the Vecton, if the lamp starts to light, then fails, this is a 100% indication of a loose connect.
We suggest FULLY disconnecting each end, then re-aligning the pins to the lamps connectors and simply gently pushing these against the lamps/bulb. If this fails, this should be done outside the unit to better connect to ends and note for leak issues.
Once operating, your UV Lamp will not pull the rated wattage with an electronic ballast due to "Ballast Factor" so if testing, do not be alarmed if your 25 Watt UV pulls only 16 -18 watts.
• Do NOT use a surge protector or Apex Controller with any UV that utilizes an electronic ballast (it can be permanently damaged by such use)
With the 110 PRO UV, the white retainer clamps must be removed first to check each lamp pin connection. IF even one connection is loose the UV will not fire.
As well the wires going into the ballast could be loose from rough handling in installation, shipping, or repair, so these should also be checked (including with a multi-meter.
It is noteworthy with the 110 UV, we have never had one ballast failure with a new unit, so this is not your problem if a new unit fails to light.
• TMC recommends vertical mounting of the Vecton UVs (positioning the outlet and inlet up and down) for best results.
However we have successfully used these UVs in less than perfect vertical positions with good success, but best results will still be achieved with vertical mounting (meaning the unit is horizontal).
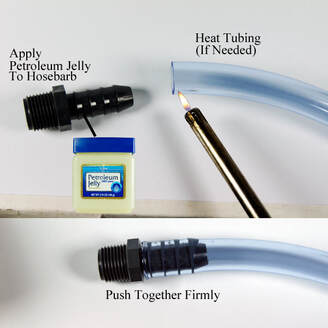
• We recommend testing for leaks for these and all other brands of UVs with a simple blow and "suction" test. Simply plug on hose barb and then blow in the other, then also suck into the other hose barb as well as it should maintain suction. This is 100% effective as per Carl's years of experience.
• We recommend all outdoor applications be connected to a GFI receptacle (a standard 15 amp breaker works for all TMC UVs)
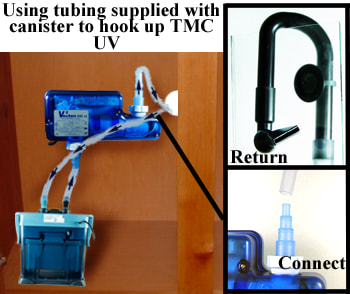
• The sterilizer should always be placed below the water level of the aquarium
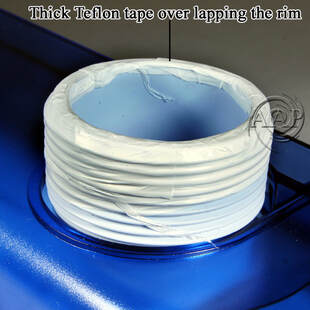
Teflon Tape on UV Outlet for better fit
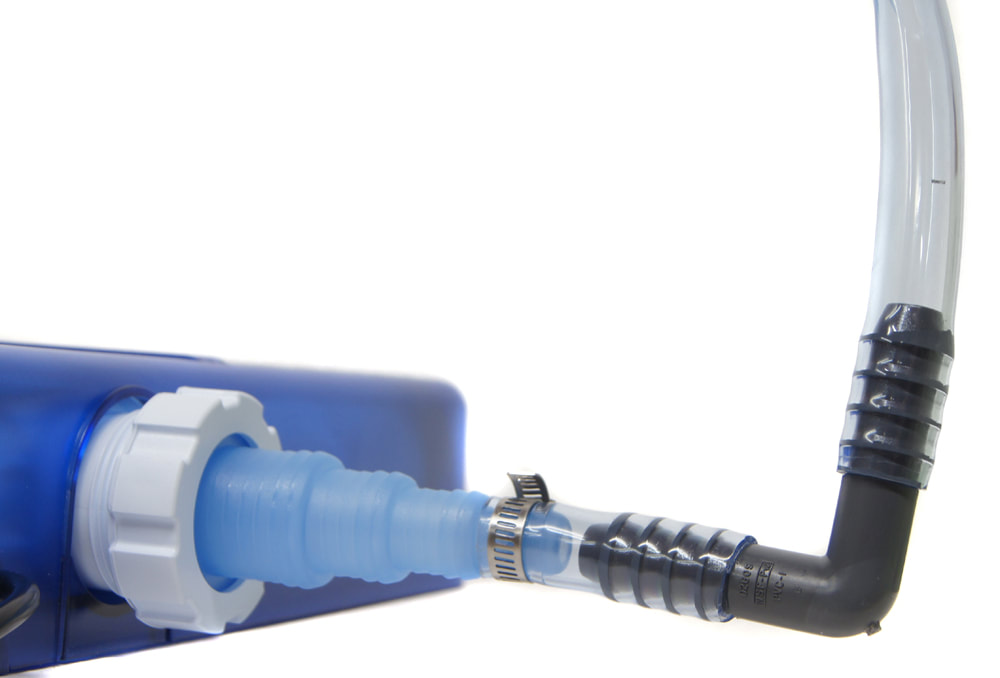
• The Vecton Pivoting 90° Elbow may need the use of Teflon Tape on the threaded nipple side of the Vecton for a secure fit, making sure to OVERLAP the end of the nipple well with Teflon Tape with several windings. Otherwise, these need to be hand tightened VERY tightly for a best fit. The elbow should be set to the angle desired be BEFORE tightening, if it can moved once set, it is NOT properly secured. DO NOT over tighten or it may crack prematurely!
• We recommend changing the UV Lamps/Bulbs every six months for aquariums & warm climate ponds and every 12 months for cool climate ponds.
• 'O' Rings should be changed every 3rd or 4th lamp change (although every bulb change as per TMC is OK)
• The Pond Advantage UVs can be placed above the pond (assuming proper pump head pressure), however if possible less head pressure is needed for a UV placed at or below the pond level.
• 'O' Rings should be changed every 3rd or 4th lamp change (although every bulb change as per TMC is OK)
• The Pond Advantage UVs can be placed above the pond (assuming proper pump head pressure), however if possible less head pressure is needed for a UV placed at or below the pond level.
UV Lamp Troubleshooting Article
Videos
|
|
|
|
|
|
|
|
|
|
|
|
|
|
|
|


