Freshwater Planted Aquarium
Plant Care | Substrate| Ferts | CO2 |Lighting
Plant Care | Substrate| Ferts | CO2 |Lighting
Overview
This article is intended to take the novice through the basics of plant keeping and get them ready for advanced techniques. It will include several outside references for more in depth information (such as lighting, see below) that I strongly recommend reading, particularly as you require more advanced plant keeping methods.
For further information:
How aquarium lighting works - best lights, PAR and more
A little background on this article: my experience in keeping planted aquariums is based on many successful planted aquariums that I maintained for my clients of my aquarium maintenance business.
I maintained these planted aquariums in a way that achieved results that were both cost effective, often (but not always) low tech, and simple.
Some of my practices were very similar to what is now called the "Walstad Method" (this was known as the German Method for years), which in the end is what pleased my clients.
The Walstad Method takes its name from Diana Walstad and her book, Ecology of the Planted Aquarium. It is characterized by striving to achieve a balance between the fish and plants in the tank such that fish provide nutrients for the plants and plants detoxify the water for the fish.
However I also respectfully differed due to the fact an aquarium is closed system. The reason being that the nutrients derived from fish and their feeding I found were generally not enough, if only for required mineral Cations for Redox balance important for fish health, so I still supplemented some even in these basic planted aquariums.
Outside Resource:
Ecology of the Planted Aquarium by Diana Walstad
What was NOT desired by the majority of my clients were the high tech methods that are more time consuming and more expensive (if only for the cost of your time in maintaining these types of tanks). So, my experience with some of these high tech methods is more limited, although I continue to read & experiment too.
However, I do provide information as well as outside resources for these methods, too, if you are interested in them. If I can't help you, I at least want you to be able to help yourself.
This information is NOT intended to contradict any of the high tech planted aquarium methods (many are referenced here too). As well, I come at planted aquariums from the prospective that it is still about an aquarium with fish with nice plant growth, not an aquarium that is an aquatic garden with explosive plant growth with a few token fish that have no spaces where they would naturally swim in.
What I am not is a planted aquarium "guru". But, based on emails I receive, as well as other communications with hobbyists, much of what is contained in this article will help at least 80% of readers and the others may still glean helpful insights from reading this article and the outside resources I suggest here. I have had many clients as well as readers who have followed my methods over the years with beautiful planted fish aquariums with good plant growth (albeit maybe not explosive growth).
Much of what is contained in this article is based on my observations and methods I used as well as learning from others in forums, reading, etc. and continued inside & outside research.
I think you as a reader will find it useful.
Please follow links to outside reference for further explanations of more in depth information such as advanced CO2 systems, lighting, algae, etc.
Also, we provide links to excellent online places to purchase plants. These are not affiliated with us in any way. We only provide these resources as a service to our readers and because we believe these businesses are worth visiting.
Filters
Many will ask, "What is the best aquarium filter?" Admittedly "best" is a loaded word, as there are many filters that will work. However, as you read further in this article, you will see that some filters can and will effect chemistry, water parameters, use of fertilizers, etc. more than others, and thus, have a positive or negative influence on your aquatic plants.
So, what you want is a filter that will keep ammonia and nitrites at absolute 0 while preserving some bio-available minerals, nitrates and CO2. This filtration capacity must occur even when organic wastes may suddenly spike (such as due to plant deaths, fish deaths, over feeding, temporary blackouts, etc.).
For this reason, Wet/Dry, many HOB, and even many canister filters are not always the best choice for planted aquariums (especially for the "Walstad Method").
Wet/Dry, in particular, will strip CO2, as will many Hang-on-back (HOB) filters, and some canister filter set-ups (although a proper set of your canister filter products such as Matrix or Purigen along with LIMITED water spray in return can help).
This is not to say you cannot use a wet/dry filter for a planted aquarium, as I have successfully done so with many client aquariums.
HOWEVER in my controlled tests involving a few of my larger clients where I had dozens of aquariums at my disposal for these tests, the Sponge Filters and much more so the FSB Filter clearly out performed any wet dry filter (this includes exact matches to the popular eshopps wet/dry filters).
To qualify this statement, what really set the FSB Filters and to a lessor degree the sponge filters apart was the fact these filters do NOT wear off CO2 nearly as much as the typical wet/dry such as the eshopps, thus I was able to maintain these aquariums without the expensive and often time consuming advanced CO2 systems, which my clients who wanted as little hands on with their aquariums in between my weekly visits appreciated greatly!
As per the "Walstad Method" (basically, a twist on what was known by old timers as the "German Method"), this method depends upon the plants (along with fish wastes) to do most of the work for maintaining the aquarium chemistry and water quality (as far as the Nitrogen Cycle ONLY) while the aquarium keeper provides circulation, some ferts and mineral cations that are not supplied or kept up with adequately by fish food, and cleanings ONLY when necessary.
My personal experience and knowledge of aquarium chemistry suggests that at least a simple sponge or more advanced fluid sand bed filter should be used for best results if you are using the "Walstad Method". HOWEVER, this depends upon your bio-load (fish, shrimp, etc.) versus the amount of plants you stock.
If you have more fish, for example, you will need more plants to balance them out.
In a heavily planted aquarium with a low bio-load, basic water circulation may be all you need if you are following this method. BUT, despite some commentary to the contrary, a tank WITH a high bio load (and this often includes large snail populations), a good bio filter is a MUST!
Please see further in this article as per the "Walstad Method" and Aquarium Chemistry as it pertains to: Basic planted aquarium water parameters.
For further information:
Aquarium Bio Load
Back to Filters:
Based on my head-to-head controlled tests in the 1990s, I found that quality sponge filters and fluidized sand bed filters met the requirements for aerobic bio-filtration that best fit a planted aquarium environment. While other filters may work fine (for those of you questioning this who have other filters), the facts are that other filters will strip more CO2 from the water and will not provide the same levels of high aerobic bio filtration, nor respond to sudden ammonia spikes the way these two types of filters can.
This places them ahead of the others in the planted aquarium. It does not mean you can't use other filters, however. It just means our experiences and data show they have distinct advantages.
|

|
It is also important to compare apples to apples if you are considering a sponge filter over, say, a canister filter. For instance, a low quality sponge material like the Lees #13390 sponge filter or Chinese made Hikari sponge filter are not going to come close to a SunSun 402 filter for a 60 gallon aquarium, for example.
However, a high volume AAP/ATI Lustar Hydro Sponge #5 will compare reasonably well without some of the draw backs (the Hydro Pond #2 or a Hydro Sponge #5 Combo will actually out perform the aforementioned canister filters).
Throwing the fluidized (FSB) filter into the comparison (which we think is even better for planted aquarium), the AAP Fluidized Filter #150, will easily outperform similar canister filters. These kind of comparisons can be also made to many "hang-on-back" (HOB) filters as well.
A power head water pump such as the Rio 1000 coupled witha Filter Max #2 or #3 Sponge Pre-filter can be used to run your FSB Filter.
Product References:
AAP/ATI Lustar Hydro Sponge #5
AAP Fluidized Filter for the Planted Aquarium
AAP/Rio Plus 1000 Pump
AAP Filter Max Sponge Pre-Filters
Obviously, I am biased toward sponge and fluidized filters. However this does not mean you cannot keep a very successful planted tank without these filters. Nothing could be further from the truth, and this should not be assumed from this article!
What I am saying is to consider these two filters for their simplicity, effect on water parameters, and the fact that many professionals and experienced hobbyists use these with top-notch results. I am emphasizing them because, especially in the case of sponge filters, many aquarists overlook them and focus on the name brand (and more heavily advertised) canister and hang-on-back filters.
The sponge filter is definitely worth considering if you have shrimp in your aquarium as many planted aquarium keepers often do. Unlike most all other filters, the sponge filter cannot "suck up" juvenile shrimp. If a sponge filter is used with shrimp present, I suggest using the air-powered method, not a powerhead. It is possible for the power head to accidentally become disconnected and then be a danger to the shrimp (an air pump also provides a more gentle vertical current that is better and safer for shrimp).
Please reference these articles:
Sponge Filtration: Facts, Myths & Information
Aquarium Filtration: Information about Filters, Use, and Troubleshooting
Freshwater Aquarium Filter Set-Up Suggestions
Do Bio Wheels Filters work as Claimed? Our Controlled Tests
Water Circulation is closely related to the filtration of your planted aquarium. By default, most filtration also provides circulation.
However, some filters provide more than others. Conversely, the circulation of many not be fully adequate with some filters (such as a fluidized sand filter).
Consider, too, that most of the natural environments we are duplicating with our planted aquariums (which often include fish such as Discus or Cardinal Tetras) do not have constant heavy circulation. I have had better experience with these aquariums by providing many "dead" spots with little (or even no) water current.
For example, contrast a planted/Amazon River aquarium that has low water movement with a reef aquarium which should have much more water current.
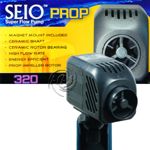
A relatively new water pump type is the propeller type, which is my choice for planted aquariums (especially with Ram cichlids, Discus, and similar South American fish) or high tech planted aquarium where higher flow is desired.
Like the name says, a propeller pump utilizes a propeller blades like you might find on a boat motor to push water. This is as opposed to an impeller that tends to suck water through the device to be expelled out the end. While the impeller is inside a casing, the propeller has an open design.
This design provides a much softer widespread flow versus the more common high focused current of popular power heads. Additionally, this design will not drive out CO2 as much as other pumps if positioned lower in the water. Obviously, the more traditional power heads can be optimized as well, just not as readily in my opinion.
As a side note, both propeller pumps and traditional power head pumps MAY not be a good choice for planted tanks with shrimp, especially since juvenile shrimp can get sucked into the intake screens.
Product Reference:
*Rio Seio: a perfect propeller water pump
While many other propeller/circulation pumps have become popular of late, the Seio remains one of the most reliable with a design that is also less likely to intake fish or plant parts & is still the model I suggest over those with the many bells and whistles such as the "VorTech MP40 Propeller Pump" that in the end do very little more for what the pump is meant for and are not as durable.
Reference:
VorTech MP40 Propeller Pump Review
However, some filters provide more than others. Conversely, the circulation of many not be fully adequate with some filters (such as a fluidized sand filter).
Consider, too, that most of the natural environments we are duplicating with our planted aquariums (which often include fish such as Discus or Cardinal Tetras) do not have constant heavy circulation. I have had better experience with these aquariums by providing many "dead" spots with little (or even no) water current.
For example, contrast a planted/Amazon River aquarium that has low water movement with a reef aquarium which should have much more water current.
A relatively new water pump type is the propeller type, which is my choice for planted aquariums (especially with Ram cichlids, Discus, and similar South American fish) or high tech planted aquarium where higher flow is desired.
Like the name says, a propeller pump utilizes a propeller blades like you might find on a boat motor to push water. This is as opposed to an impeller that tends to suck water through the device to be expelled out the end. While the impeller is inside a casing, the propeller has an open design.
This design provides a much softer widespread flow versus the more common high focused current of popular power heads. Additionally, this design will not drive out CO2 as much as other pumps if positioned lower in the water. Obviously, the more traditional power heads can be optimized as well, just not as readily in my opinion.
As a side note, both propeller pumps and traditional power head pumps MAY not be a good choice for planted tanks with shrimp, especially since juvenile shrimp can get sucked into the intake screens.
Product Reference:
*Rio Seio: a perfect propeller water pump
While many other propeller/circulation pumps have become popular of late, the Seio remains one of the most reliable with a design that is also less likely to intake fish or plant parts & is still the model I suggest over those with the many bells and whistles such as the "VorTech MP40 Propeller Pump" that in the end do very little more for what the pump is meant for and are not as durable.
Reference:
VorTech MP40 Propeller Pump Review
Lighting
The beginning aquarist is likely to think that if there's enough light to see then it's enough for plants to grow.
However, that's not true. If you want to grow healthy plants, and not just algae, you need enough light for them to use for photosynthesis and create energy.
It used to be that people advised 3-4 watts per gallon as a VERY basic principle. But, due to modern lighting technology this is now considered an outdated notion (with PAR now more the norm).
The “watts-per-gallon" formula was based on the older T8 & T12 fluorescent lights, many of which were not of optimum PAR/Kelvin and especially PUR, and are severely lacking in the area of lumens per watt. Besides that, "useful light energy" (aka PUR) is something that is often overlooked and is an area where the new generations of LED lights that emit "natural daylight" spectrums cannot be beat.
That being said, along with Metal Halide, the new generation SHO and T5s are also relatively strong in this area. Lumen focus and restrike is an area in which the LED and metal halides reign supreme with almost all light energy directed where the light needs to be: in your aquarium.
The reason this 'watts per gallon' formula can be poor other than comparing LEDs within a specific brand is the efficiencies of so many lights can vary greatly due to design, poor circuitry, low quality emitters, fans, and much more.
With an LED fixture, we can prove our LED efficiency by comparing PAR at the same depth (15" of air is the standard). Using LED fixtures of similar lens angles (120/unlensed to 120, 90 to 90, etc.).
Take the input wattage and divide it by the PAR reading. You will find efficiencies as high as .08 watt of input energy per point of PAR in the AAP Reef White NP 2000 LED to as low as 2.7 watt per point of PAR in the Beamswork EA Timer FSPEC LED. Most of the better LEDs are under .30 watt with most falling in the .4 to .50 watt range such as the Fluval Fresh & Plant 2.0
Reference:
Aquarium Lighting; LEDs
Besides watts per gallon these other factors are also quite important:
Lumens per watt.
PAR (often easiest determined by Kelvin output) - this is an area of lighting along with "Useful Energy" where the old "watts-per-gallon" rule/guide really falls apart, especially with modern top tier LED lights.
Lumen focus & restrike
PUR or "Useful Light Energy" (not wasted in yellow/green light spectrum that green plants and zooanthellic algae reflect)
Output in relation to bulb length (this is where LEDs and to a lesser extent T2s and T5s excel).
Lux - I generally only consider this parameter in deeper planted freshwater aquarium to determine if I am getting the proper light where it needs to be.
The starting point of late is PAR, followed by PUR.
Here are some considerations as per PAR (poor spectrums as per PUR would require this to be much higher, such as warm white):
* Low light - 15-30 micromols of PAR - CO2 is not needed, but is helpful to the plants
* Medium light - 35-50 micromols of PAR - CO2 may be needed to avoid too many nuisance algae problems
* High light - more than 50 micromols of PAR - pressurized CO2 is essential to avoid major algae problems
Source:
Lighting an Aquarium with PAR instead of Watts
Another determining factor is the type of plants you will be keeping.
The common and ACCURATE term would be low, medium, & high light plants. Examples include Java Fern for low light and Wendtii for high light.
Do NOT confuse the term "Low Tech versus High Tech" planted aquarium with "Low Light versus High Light". These two terms are NOT the same!
A Wendtii requires high light regardless of of whether you use a high tech method that involves pressurized CO2, Fert drips or not!!
Based on my many years of experience and 1000s of aquarium set up and kept for clients, you can have an aquarium that produces enough CO2 via "low tech" methods such as employing filters that do not wear off CO2 (such as the Fluidized Sand Bed) along with use of foods and simple supplements that easily can be qualified as low tech, HOWEVER this still does not mean you can get by with a 15 watt T8 cool white fluorescent lamp on a 20 gallon aquarium for a high light plants.
A key point is that light is the controlling factor in planted aquariums. The more light, the more CO2 and Ferts that are required.
This said this correlation does work the somewhat the other way based on my experience and research. Meaning that if you inject too much CO2 & Ferts without increasing light, your growth may not as expected
For MUCH more expanded information about lighting (including more in-depth explanations of the above subjects), please read this article:
“How Aquarium Lighting Works: Help with understanding Kelvin, Nanometers, PAR, PUR, Reef, Freshwater Plant & more”
For further reference:
Natural Daylight Planted Aquarium LED Lights
Time:
Generally, around 12 hours per day of lighting is best (if multiple lights are used, on and off times can be staggered, such as 12 hours for half and 10 hours for the other half of lights), I recommend using a timer as well for more reliable lighting on/off time.
Suggestions for Lighting your Planted Freshwater Aquarium:
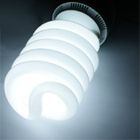
For those needing a bit more economy, but cannot afford a well made/longlife HO LED such as the GroBeam or AI Hydra, instead of the shotgun emitter, low quality daisy chain drivers of Fluval, Current Satellite, or Finnex LEDs, a consideration would be the SHO (Super High Output) compact fluorescent lamps (CFL).
These use 65, 85, & 105 watts, however these awesome bulbs put out the equivalent of 325, 425 and 525 watts respectively! (Pictured to the left and below in a photo-shop example of placement.)
Honestly, for any aquarium plant keeper who is remotely handy in DIY projects, the SHO lamps are hard to beat, especially for tanks over 50 gallons. Many in the green house industry have already discovered this lamp for its plant growing capabilities, which for the price there is simply no equal for planted aquariums!
The aquarium hobby/industry is much slower to adopt many technologies and this light is a major example of this. Without question, this is the lamp that could or should be used by any serious planted freshwater aquarium keeper.
For example in a 5-6 foot long 125-150 gallon aquarium, four 85 Watt 6400K SHO staggered in four separate incandescent single sockets will provide ample light in the correct PAR for healthy plant growth. I would also stagger the on/off time for these lamps so that two were on for 12 hours and two were on for ten hours.
The advantage of this light system, besides high lumen and PAR light output, is the low set up cost compared to most other lighting systems. The negative is that these lights are not as consumer ready for aquarium applications and require some DIY abilities to install either incandescent sockets or a pendant fixture.
Better yet is mounting the lamps inside a fixture with a reflector.
Please click on the picture above to enlarge for a better view of the diagram displaying approximate SHO lamp placement in a planted freshwater aquarium.
This depiction shows four lights, which is suggested for aquariums over five feet in length. Although, for an aquarium 4 feet or less in length, two lights is generally adequate and only one light is needed for tanks that are 2 feet or less in length).
Product Reference:
Premium SHO (Super High Output) Aquarium Lights and Lamps for Planted Aquariums
If Economy is what you are looking for, best to buy economy rather than the before mentioned economy LED lights with poor warranties and poor output per input energy masquerading with good marketing as quality LEDs (& prices to match).
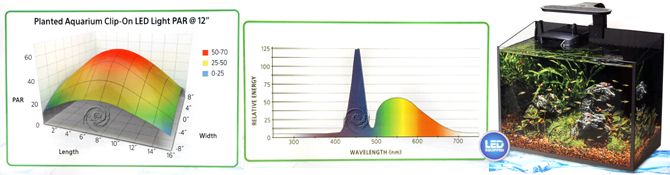
The AAP/Aqueon Clip On LED can run up to a 20 gallon standard high light planted tank and multiples can run much larger (such as two for a standard 36 inch 40 gallon aquarium).
See Picture Below
For those needing a bit more economy, but cannot afford a well made/longlife HO LED such as the GroBeam or AI Hydra, instead of the shotgun emitter, low quality daisy chain drivers of Fluval, Current Satellite, or Finnex LEDs, a consideration would be the SHO (Super High Output) compact fluorescent lamps (CFL).
These use 65, 85, & 105 watts, however these awesome bulbs put out the equivalent of 325, 425 and 525 watts respectively! (Pictured to the left and below in a photo-shop example of placement.)
Honestly, for any aquarium plant keeper who is remotely handy in DIY projects, the SHO lamps are hard to beat, especially for tanks over 50 gallons. Many in the green house industry have already discovered this lamp for its plant growing capabilities, which for the price there is simply no equal for planted aquariums!
The aquarium hobby/industry is much slower to adopt many technologies and this light is a major example of this. Without question, this is the lamp that could or should be used by any serious planted freshwater aquarium keeper.
For example in a 5-6 foot long 125-150 gallon aquarium, four 85 Watt 6400K SHO staggered in four separate incandescent single sockets will provide ample light in the correct PAR for healthy plant growth. I would also stagger the on/off time for these lamps so that two were on for 12 hours and two were on for ten hours.
The advantage of this light system, besides high lumen and PAR light output, is the low set up cost compared to most other lighting systems. The negative is that these lights are not as consumer ready for aquarium applications and require some DIY abilities to install either incandescent sockets or a pendant fixture.
Better yet is mounting the lamps inside a fixture with a reflector.
Please click on the picture above to enlarge for a better view of the diagram displaying approximate SHO lamp placement in a planted freshwater aquarium.
This depiction shows four lights, which is suggested for aquariums over five feet in length. Although, for an aquarium 4 feet or less in length, two lights is generally adequate and only one light is needed for tanks that are 2 feet or less in length).
Product Reference:
Premium SHO (Super High Output) Aquarium Lights and Lamps for Planted Aquariums
If Economy is what you are looking for, best to buy economy rather than the before mentioned economy LED lights with poor warranties and poor output per input energy masquerading with good marketing as quality LEDs (& prices to match).
The AAP/Aqueon Clip On LED can run up to a 20 gallon standard high light planted tank and multiples can run much larger (such as two for a standard 36 inch 40 gallon aquarium).
See Picture Below
Product Source:
AAP Planted Freshwater Aquarium LED Clip-On Light
AAP Planted Freshwater Aquarium LED Clip-On Light
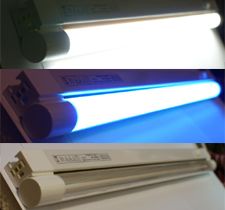
The other alternatives are the T5 & T2 Lights.
While less known, the T-2 lamps and fixtures are also great for plants. With over 70+ lumens per watt, lower wasted light energy (less wasted than SHO & other CFLs) and very compact size, the T-2s have a lot going for them.
For example two 13 Watt 6400 K T2s are excellent for a 20 gallon with plants that require high light. Multiple T2s can be interconnected for larger aquariums so as to require just one outlet.
For instance, you could have four 13 Watt 6400K T2s for a 60 gallon with plants requiring medium light.
Unfortunately the rush to LEDs along with a turn down in the professional aquarium keeping hobby toward discounters has all but killed the T2 light.
The picture to the left is an example of an excellent compromise for cost and still have very good PUR/PAR planted Aquarium light output.
This 55 gallon aquarium has two AAP GroBeam 600 Ultimas along with two T2 6400K 13 Watt Fixtures. As you can see the plant growth and light output are excellent.
Product References:
T2 miniature high output aquarium light fixtures
AAP GroBeam 600 LED Strips
This 55 gallon aquarium has two AAP GroBeam 600 Ultimas along with two T2 6400K 13 Watt Fixtures. As you can see the plant growth and light output are excellent.
Product References:
T2 miniature high output aquarium light fixtures
AAP GroBeam 600 LED Strips
The newest technology yet would be an LED light such as the top notch AI Hydra Twenty-Six HD or AAP Aqua Ray with latest generation (patented) high PUR CREE XB-D Power LEDs. As noted earlier these can be as the only source of light or in combination with T2, T5, CFL, etc.
Although initial cost is high (but much lower than they were a year prior to this update), the 50,000 hour lifespan and lowest energy usage pays for these lights in the long term.
Combine that with the highest lumens per watt, PWM driver technology (AquaRay only), the lowest wasted light energy and the highest focused lumens and you have a real top-notch planted aquarium light that requires only .6 watts per gallon for high light requiring plants!
My personal recommendation is an AAP GroBeam “Natural Daylight" or a combination with the “Colour Plus” LED Fixtures (for deeper aquariums or to bring out certain plant colors, mixed with the GroBeam Daylight). For instance, just two GroBeam 600 Strips can create enough light for a 60 gallon low/medium light planted aquarium (I would add 3-4 GroBeam 600s or 2 GroBeam 1500 Ultimas for high light plants).
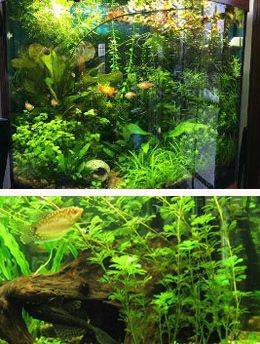
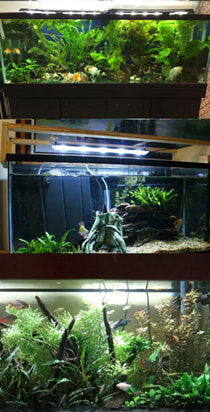
The picture above shows:
100 gallon aquarium (top picture) with 4) GroBeam 600 & (1) Marine White 600 LED Lights
40 gallon with JUST ONE GroBeam 600 LED (center)
75 gallon (bottom) with two GroBeam 1000s (now 1500s) and VERY high plant growth!!
Other "high end" LED options include:
A single Mini 400 is excellent for "high light" planted aquariums under 20 gallons.
The AAP Colour Plus for low to medium light planted aquarium.
The Colour Plus brings out the color of fish and plants better than most other LED lights available, without as much potential of unwanted algae growth due to the over use of blue emitters by some competing LED Lights.
The Colour Plus can be augmented with the GroBeam models for high light aquariums.
We recommend adding one GroBeam per Colour Plus, or for larger aquariums requiring more light, 2 GroBeams per Colour Plus. In either case, this is a great combination that will really bring out the colors of your fish while providing ample light for hungry plants!
For those super high tech planted aquarium enthusiasts such as those using the EI method of dosing, and needing the highest light output per square inch/centimeter, the adjustable spectrum AI Twenty-Six Hyper-Drive might be the LED for you!
While the AAP AquaRay/GroBeam line of LEDs is still my recommendation for most applications, especially those seeking the highest PUR per input wattage of energy and the over all efficiency (& guaranteed fixture longevity), the AI Hydra HD LEDs provide a light for this specific niche of high tech aquarium keepers.
Product references:
AAP GroBeam “Natural Daylight” 600 Strip with latest generation CREE XB-D Power LEDs
AAP GroBeam 1500 Ultimas for High Light Aquariums with latest generation CREE XB-D Power LEDs
AAP Colour Plus 1500
Finally for reasons of simplicity and economics the CFL lights are also an excellent choices for low to medium light planted freshwater aquariums. Both the CFL and LED light types come highly recommended for planted aquariums under 45 gallons.
Basically, if you are looking for the lowest start-up cost to provide light for planted aquarium, then CFLs are the way to go. Because of their widespread use, it's very inexpensive to find or make fixtures to provide light for your aquarium.
Or, if you have more money to spend up-front and are prioritizing efficiency and savings over the long run, you will be better suited with LEDs. A long lifespan and low energy usage along with less heat emitted make LEDs a great choice.
Product reference:
6400K CFL Lights for planted freshwater aquariums
Although initial cost is high (but much lower than they were a year prior to this update), the 50,000 hour lifespan and lowest energy usage pays for these lights in the long term.
Combine that with the highest lumens per watt, PWM driver technology (AquaRay only), the lowest wasted light energy and the highest focused lumens and you have a real top-notch planted aquarium light that requires only .6 watts per gallon for high light requiring plants!
My personal recommendation is an AAP GroBeam “Natural Daylight" or a combination with the “Colour Plus” LED Fixtures (for deeper aquariums or to bring out certain plant colors, mixed with the GroBeam Daylight). For instance, just two GroBeam 600 Strips can create enough light for a 60 gallon low/medium light planted aquarium (I would add 3-4 GroBeam 600s or 2 GroBeam 1500 Ultimas for high light plants).
The picture above shows:
100 gallon aquarium (top picture) with 4) GroBeam 600 & (1) Marine White 600 LED Lights
40 gallon with JUST ONE GroBeam 600 LED (center)
75 gallon (bottom) with two GroBeam 1000s (now 1500s) and VERY high plant growth!!
Other "high end" LED options include:
A single Mini 400 is excellent for "high light" planted aquariums under 20 gallons.
The AAP Colour Plus for low to medium light planted aquarium.
The Colour Plus brings out the color of fish and plants better than most other LED lights available, without as much potential of unwanted algae growth due to the over use of blue emitters by some competing LED Lights.
The Colour Plus can be augmented with the GroBeam models for high light aquariums.
We recommend adding one GroBeam per Colour Plus, or for larger aquariums requiring more light, 2 GroBeams per Colour Plus. In either case, this is a great combination that will really bring out the colors of your fish while providing ample light for hungry plants!
For those super high tech planted aquarium enthusiasts such as those using the EI method of dosing, and needing the highest light output per square inch/centimeter, the adjustable spectrum AI Twenty-Six Hyper-Drive might be the LED for you!
While the AAP AquaRay/GroBeam line of LEDs is still my recommendation for most applications, especially those seeking the highest PUR per input wattage of energy and the over all efficiency (& guaranteed fixture longevity), the AI Hydra HD LEDs provide a light for this specific niche of high tech aquarium keepers.
Product references:
AAP GroBeam “Natural Daylight” 600 Strip with latest generation CREE XB-D Power LEDs
AAP GroBeam 1500 Ultimas for High Light Aquariums with latest generation CREE XB-D Power LEDs
AAP Colour Plus 1500
Finally for reasons of simplicity and economics the CFL lights are also an excellent choices for low to medium light planted freshwater aquariums. Both the CFL and LED light types come highly recommended for planted aquariums under 45 gallons.
Basically, if you are looking for the lowest start-up cost to provide light for planted aquarium, then CFLs are the way to go. Because of their widespread use, it's very inexpensive to find or make fixtures to provide light for your aquarium.
Or, if you have more money to spend up-front and are prioritizing efficiency and savings over the long run, you will be better suited with LEDs. A long lifespan and low energy usage along with less heat emitted make LEDs a great choice.
Product reference:
6400K CFL Lights for planted freshwater aquariums
Substrate
As you can imagine, the "ground" in your planted aquarium is very important. Plants need something to hold them down and dig their roots through.
This is provided by a good sandy base and careful cleaning so as to not disturb this.
In fact, many planted aquarium keepers advise minimal use of gravel vacuums so that plants can pull nutrients from fish wastes and extra fish food. Of course, much of this depends on how heavily planted your tank is.
In any case, the roots of the plants dig through the substrate for their food, breaking down fish waste and rotting food. The roots are supported by symbiotic bacteria that aid in nitrate assimilation and other processes.
For healthy plants I would suggest any of the following: a substrate of #1 sand mixed with Flourite, Onyx Sand, ADA Aquatic Substrates, or maybe Eco Complete, about 3-5 cm deep with a layer of #3 gravel or better, #5 pebble (for sensitive fish such as Cory Cats) on top about 2 cm deep. Or simply mix with #0 sized sand.
This combination works well for plant roots, ease of vacuuming the top layer ONLY, and for better bio filtration. This also helps "hold down" these plant substrates, especially ADA Aquasoil which will tend to get very fine and dusty with time.
The total depth of sand, plant substrate or any combination thereof should be about 3-5 inches for most rooted aquarium plants.
One disagreement I have with the manufacturers of these products is in the amount needed.
I have found that just enough of the Flourite, Onyx, etc. to cover the area of plants roots ONLY, then use #3 and/or #5 gravel/pebbles in all other areas.
What I have found is this keeps bacteria often found in substrate such as Aeromonas and Pseuodomonas from coming in contact with fish as easily, especially bottom dwellers. I have also found this lowers Hydro Sulfide Production.
Another simple reason for this method is cost savings; why spend extra money on copious amounts of Flourite, EcoComplete when there is no benefit and in fact I have found better results with the before noted blend??
For further information:
Aquarium Substrate Information- sand
Hydrogen Sulfide in Aquariums
Seachem Onyx Sand substrate
Product reference:
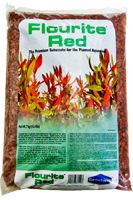
Seachem Flourite substrate
For an "old school" DIY method that has been used for years that I too have used for a substrate on a budget; one can substitute Eco Complete, or similar product, with a DIY sandy top soil/compost, by preparing the soil thus:
Gather aged compost mixed with a sandy top soil (although not good a source of iron, adding a nail or similar to this compost as it ages can add some iron).
Next, add water and then rinse and strain to remove large debris until the water runs relatively clear (do not over rinse or you remove nutrients).
I then will let it sit in the open for a few days.
A 10:1 bleach solution can be used, although some recent experiments of mine suggest this will destroy valuable organic nutrients. However, this will not affect mineral nutrients.
The sand that is left is what you mix with your plant roots. Please note that, although an inexpensive route to go, this ‘homemade plant substrate still eventually needs replenishment for nutrients.
Similar to the above is another "old school" method of saving old aquarium sand that is higher in organic nutrients, which is then harvested and then placed in a new planted aquarium with larger grain gravel or pebbles on top.
Another substrate suggestion is Seachem Onyx Sand. This product is carbonate rich with high amounts of calcium and magnesium and is particularly suited for plants that prefer large amounts of these minerals such as Anubias or in tanks that are supplied by a water source that is very mineral poor. (The use of Wonder Shells and buffers can help as well.)
Please be careful when vacuuming with many plant substrates as it is easy to suck the lighter grains up into vacuums and many will mistake these often lighter than gravel substrates as waste, this is especially common with inexperienced aquarium keepers. Sadly, many of these inexperienced aquarium keepers make statements at Yahoo Answers or YouTube that this substrate represents a "dirty" aquarium often confusing others that do not know better.
Not all substrates are light but many are. So, extreme care should be exercised with these light substrates. You may want to try "kinking" the tubing from the vacuum bell to lower the sucking power or simply avoid areas of plant substrates.
See also:
"Aquarium Cleaning: Reasons and Methods for Water Changes"
Other sands for use as a substrate for planted freshwater aquariums:
Pool Filter sand and “play sand” are commonly recommended and used for planted aquariums as well.
There is a lot of mis-information both pro and con as to the use of these sands for planted aquariums. To start with, these sands are primarily silica sand with play sand being more dusty.
Some have stated that silica sand is unsafe for use in either freshwater or saltwater. However, nothing is further from the truth as silica sand is 99.0-99.9% SiO2 and is considered "totally insoluble" in water according to the US MSDS. The fact is that your aquarium glass is made primarily made from this ingredient and would also be dangerous to your fish if this were true.
Some advocates of using these sands state that they provide nutrients necessary for plant roots. This is definitely not true and is NOT a reason to use pool sand or play sand.
Sand is inert and plants cannot absorb nutrients from the grains! This is why you use sand as a cap over a substrate such as Flourite or EcoComplete that is capable of absorbing and releasing nutrients for plants.
Please reference this article for further information:
Pool Sand Composition
Another method is to use product that is already a primary gravel/sand substrate such as the use of Baylee's Better Bottom substrate. This is similar to my method of using #1 sand mixed with clean compost or #1 sand and/or #3 gravel mixed with Azoo Plant Grower Bed, Flourite or similar.
The advantages of this product are that it is inexpensive, it looks nice (since it is primarily rock), and it is simple to use with many nutrients already added.
The disadvantage that is the amount of nutrients in this substrate is lower than the use of the aforementioned plant grower substrates. Therefore, adding additional nutrients would obviously be necessary at some point (although one can use Baylee’s Substrate and then add EcoComplete or Flourite later).
Transplantation:
Transplantation is an important consideration in keeping healthy aquarium plants.
The environment (pH, GH, KH, nutrient mix, light conditions, etc.) is going to be dissimilar in your aquarium compared to the plant's previous environment. Plants, in this regard, are similar to fish, and need time to acclimate.
Extreme shock and sterile gravel are going to play havoc during the initial transplant in to the new aquarium. This shock can last a long period of time (this varies by plant, water environment, and transplant method), after this period the plant will eventually start to grow new leaves and begin to grow.
This is provided by a good sandy base and careful cleaning so as to not disturb this.
In fact, many planted aquarium keepers advise minimal use of gravel vacuums so that plants can pull nutrients from fish wastes and extra fish food. Of course, much of this depends on how heavily planted your tank is.
In any case, the roots of the plants dig through the substrate for their food, breaking down fish waste and rotting food. The roots are supported by symbiotic bacteria that aid in nitrate assimilation and other processes.
For healthy plants I would suggest any of the following: a substrate of #1 sand mixed with Flourite, Onyx Sand, ADA Aquatic Substrates, or maybe Eco Complete, about 3-5 cm deep with a layer of #3 gravel or better, #5 pebble (for sensitive fish such as Cory Cats) on top about 2 cm deep. Or simply mix with #0 sized sand.
This combination works well for plant roots, ease of vacuuming the top layer ONLY, and for better bio filtration. This also helps "hold down" these plant substrates, especially ADA Aquasoil which will tend to get very fine and dusty with time.
The total depth of sand, plant substrate or any combination thereof should be about 3-5 inches for most rooted aquarium plants.
One disagreement I have with the manufacturers of these products is in the amount needed.
I have found that just enough of the Flourite, Onyx, etc. to cover the area of plants roots ONLY, then use #3 and/or #5 gravel/pebbles in all other areas.
What I have found is this keeps bacteria often found in substrate such as Aeromonas and Pseuodomonas from coming in contact with fish as easily, especially bottom dwellers. I have also found this lowers Hydro Sulfide Production.
Another simple reason for this method is cost savings; why spend extra money on copious amounts of Flourite, EcoComplete when there is no benefit and in fact I have found better results with the before noted blend??
For further information:
Aquarium Substrate Information- sand
Hydrogen Sulfide in Aquariums
Seachem Onyx Sand substrate
Product reference:
Seachem Flourite substrate
For an "old school" DIY method that has been used for years that I too have used for a substrate on a budget; one can substitute Eco Complete, or similar product, with a DIY sandy top soil/compost, by preparing the soil thus:
Gather aged compost mixed with a sandy top soil (although not good a source of iron, adding a nail or similar to this compost as it ages can add some iron).
Next, add water and then rinse and strain to remove large debris until the water runs relatively clear (do not over rinse or you remove nutrients).
I then will let it sit in the open for a few days.
A 10:1 bleach solution can be used, although some recent experiments of mine suggest this will destroy valuable organic nutrients. However, this will not affect mineral nutrients.
The sand that is left is what you mix with your plant roots. Please note that, although an inexpensive route to go, this ‘homemade plant substrate still eventually needs replenishment for nutrients.
Similar to the above is another "old school" method of saving old aquarium sand that is higher in organic nutrients, which is then harvested and then placed in a new planted aquarium with larger grain gravel or pebbles on top.
Another substrate suggestion is Seachem Onyx Sand. This product is carbonate rich with high amounts of calcium and magnesium and is particularly suited for plants that prefer large amounts of these minerals such as Anubias or in tanks that are supplied by a water source that is very mineral poor. (The use of Wonder Shells and buffers can help as well.)
Please be careful when vacuuming with many plant substrates as it is easy to suck the lighter grains up into vacuums and many will mistake these often lighter than gravel substrates as waste, this is especially common with inexperienced aquarium keepers. Sadly, many of these inexperienced aquarium keepers make statements at Yahoo Answers or YouTube that this substrate represents a "dirty" aquarium often confusing others that do not know better.
Not all substrates are light but many are. So, extreme care should be exercised with these light substrates. You may want to try "kinking" the tubing from the vacuum bell to lower the sucking power or simply avoid areas of plant substrates.
See also:
"Aquarium Cleaning: Reasons and Methods for Water Changes"
Other sands for use as a substrate for planted freshwater aquariums:
Pool Filter sand and “play sand” are commonly recommended and used for planted aquariums as well.
There is a lot of mis-information both pro and con as to the use of these sands for planted aquariums. To start with, these sands are primarily silica sand with play sand being more dusty.
Some have stated that silica sand is unsafe for use in either freshwater or saltwater. However, nothing is further from the truth as silica sand is 99.0-99.9% SiO2 and is considered "totally insoluble" in water according to the US MSDS. The fact is that your aquarium glass is made primarily made from this ingredient and would also be dangerous to your fish if this were true.
Some advocates of using these sands state that they provide nutrients necessary for plant roots. This is definitely not true and is NOT a reason to use pool sand or play sand.
Sand is inert and plants cannot absorb nutrients from the grains! This is why you use sand as a cap over a substrate such as Flourite or EcoComplete that is capable of absorbing and releasing nutrients for plants.
Please reference this article for further information:
Pool Sand Composition
Another method is to use product that is already a primary gravel/sand substrate such as the use of Baylee's Better Bottom substrate. This is similar to my method of using #1 sand mixed with clean compost or #1 sand and/or #3 gravel mixed with Azoo Plant Grower Bed, Flourite or similar.
The advantages of this product are that it is inexpensive, it looks nice (since it is primarily rock), and it is simple to use with many nutrients already added.
The disadvantage that is the amount of nutrients in this substrate is lower than the use of the aforementioned plant grower substrates. Therefore, adding additional nutrients would obviously be necessary at some point (although one can use Baylee’s Substrate and then add EcoComplete or Flourite later).
Transplantation:
Transplantation is an important consideration in keeping healthy aquarium plants.
The environment (pH, GH, KH, nutrient mix, light conditions, etc.) is going to be dissimilar in your aquarium compared to the plant's previous environment. Plants, in this regard, are similar to fish, and need time to acclimate.
Extreme shock and sterile gravel are going to play havoc during the initial transplant in to the new aquarium. This shock can last a long period of time (this varies by plant, water environment, and transplant method), after this period the plant will eventually start to grow new leaves and begin to grow.
Bio Available Carbon (Co2)
Gasses such as oxygen and CO2 are added and subtracted from the aquarium via surface agitation.
Generally speaking it is oxygen that is added and CO2 that is subtracted. In nature, CO2 is organically added via fish respiration or other biological activity along with decomposition and chemical reactions such as alkaline buffers upon acids in the water.
Often many "hands-on" advanced aquarium keepers will utilize the most advanced pressurized CO2 system (as well as complicated fertilizer delivery). While this might be the way to go for certain high end hobbyists, from my experience (as well as other experienced pros) the expense of time and money these methods require are not always justified if all you desire is a nice but basic planted aquarium.
In fact, as a generalization, just utilizing good lighting, filtration, and basic fertilizers, as well as simple, natural CO2 generation methods (e.g. fish respiration, buffers, and plant material decomposition) can still produce good results. Albeit not to the level of advanced methods (think Walstad Method or German method)!
This of course is not to knock advanced methods for those who want optimal plant growth.
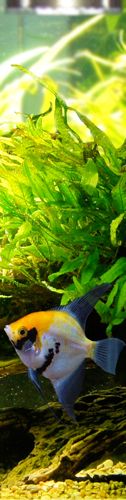
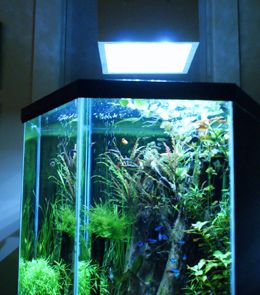
The picture to the above makes the above point as it uses a top notch AquaRay GroBeam 1000 LED Tile (now 1500) along with ONLY SeaChem Flourish Excel or NilocG Enhance and other SeaChem, AAP Grow-It, or NilocG "Ferts"; NO supplemental CO2 systems!
More about how products such as AAP/NilocG Enhance & Flourish Excel work:
Agrarium Optimum Carbon Replacement
My many years of experience as well as controlled tests have shown that a beautiful planted aquarium can be maintained WITHOUT expensive, time consuming Advanced CO2 systems.
This is where a popular aquarium lighting expert who gave a podcast interview at scapefu.com shows a lack of long term experience in the hobby and professional aquarium keeping in my opinion when she states in this podcast that you should only grow medium lighting plants if no CO2 in injected. What she and others often miss is "bio-available" CO2, and this can be provided along with good optimal lighting for high light plant growth.
This is again not to say that adding CO2, especially via advanced CO2 systems is "bad", far from it, as this is how you are ONLY going to achieve "crazy" plant growth and it often makes even simple growth easier. But just do not let others convince you to not try some high light plants if you are not planning to use injected CO2 (So please read on).
Reference:
Lighting the Planted Aquarium with Cara Wade | ScapeFu059
If your intention is to grow only low to medium light plants, at most I have found only liquid products such as Flourish Excel or NilocG Enhance to be necessary (basically to help the plants out compete the algae for CO2/carbon available via natural process), or the use of combining Alkaline and Acid buffers to the water which will then produce CO2.
Usually, nothing more need be added in a healthy aquarium eco-system for these plant types. To be clear, you can definitely get higher growth in a "high tech" aquarium, and there are certainly some hobbyists who enjoy tinkering with their system. But, if you are a beginner and wishing to keep it simple, then the low tech approach is for you.
Product Reference:
AquaRay GroBeam Highest PUR Aquarium LED Lights
Liquid CO2??
You can add what is marketed as bioavailable carbon/CO2 as noted above through Glutaraldehyde as marketed in the products AAP/NilocG Enhance or Flourish Excel by AAP/Seachem. This is probably the most simple way, in my experience. Or, you may use a CO2 generator/system, which can vary greatly in cost and CO2 delivery but are much better sources for CO2.
While AAP Enhance & Flourish Excel is claimed to work carbon source for plants, I believe that AAP Enhance & Flourish Excel work more by limiting algae growth on plant leaves, allowing the uptake of carbon naturally produced in a healthy aquarium that would otherwise be used by the algae growing on these leaves
It should be noted that experiences with Glutaraldehyde/Flourish Excel have been mixed.
When Glutaraldehyde is compared to a professional CO2 injection system, there is little contest as per the professional pressurized CO2 system (even the more basic aerosol versions will outperform Glutaraldehyde). Yet, for those who want a simple way to increase plant growth without the hassles of any type of CO2 system, especially with low/medium & even high light plants, this product is often a good choice if only to help the plants out compete algae for naturally occurring bio available carbon/CO2.
I find NilocG Enhance or Flourish Excel CAN be a useful product when used in conjunction with good lighting and ferts (fertilizers).
You could also consider setting up a drip system to slowly add Glutaraldehyde over time instead of by the capful.
Product Resources:
Flourish Excel by Seachem: a premium bioavailable carbon supplement
NilocG Enhance
For more information about Flourish Excel from a Seachem question and answer fact sheet, please follow this link:
Seachem Flourish Excel FAQ
Generally speaking it is oxygen that is added and CO2 that is subtracted. In nature, CO2 is organically added via fish respiration or other biological activity along with decomposition and chemical reactions such as alkaline buffers upon acids in the water.
Often many "hands-on" advanced aquarium keepers will utilize the most advanced pressurized CO2 system (as well as complicated fertilizer delivery). While this might be the way to go for certain high end hobbyists, from my experience (as well as other experienced pros) the expense of time and money these methods require are not always justified if all you desire is a nice but basic planted aquarium.
In fact, as a generalization, just utilizing good lighting, filtration, and basic fertilizers, as well as simple, natural CO2 generation methods (e.g. fish respiration, buffers, and plant material decomposition) can still produce good results. Albeit not to the level of advanced methods (think Walstad Method or German method)!
This of course is not to knock advanced methods for those who want optimal plant growth.
The picture to the above makes the above point as it uses a top notch AquaRay GroBeam 1000 LED Tile (now 1500) along with ONLY SeaChem Flourish Excel or NilocG Enhance and other SeaChem, AAP Grow-It, or NilocG "Ferts"; NO supplemental CO2 systems!
More about how products such as AAP/NilocG Enhance & Flourish Excel work:
Agrarium Optimum Carbon Replacement
My many years of experience as well as controlled tests have shown that a beautiful planted aquarium can be maintained WITHOUT expensive, time consuming Advanced CO2 systems.
This is where a popular aquarium lighting expert who gave a podcast interview at scapefu.com shows a lack of long term experience in the hobby and professional aquarium keeping in my opinion when she states in this podcast that you should only grow medium lighting plants if no CO2 in injected. What she and others often miss is "bio-available" CO2, and this can be provided along with good optimal lighting for high light plant growth.
This is again not to say that adding CO2, especially via advanced CO2 systems is "bad", far from it, as this is how you are ONLY going to achieve "crazy" plant growth and it often makes even simple growth easier. But just do not let others convince you to not try some high light plants if you are not planning to use injected CO2 (So please read on).
Reference:
Lighting the Planted Aquarium with Cara Wade | ScapeFu059
If your intention is to grow only low to medium light plants, at most I have found only liquid products such as Flourish Excel or NilocG Enhance to be necessary (basically to help the plants out compete the algae for CO2/carbon available via natural process), or the use of combining Alkaline and Acid buffers to the water which will then produce CO2.
Usually, nothing more need be added in a healthy aquarium eco-system for these plant types. To be clear, you can definitely get higher growth in a "high tech" aquarium, and there are certainly some hobbyists who enjoy tinkering with their system. But, if you are a beginner and wishing to keep it simple, then the low tech approach is for you.
Product Reference:
AquaRay GroBeam Highest PUR Aquarium LED Lights
Liquid CO2??
You can add what is marketed as bioavailable carbon/CO2 as noted above through Glutaraldehyde as marketed in the products AAP/NilocG Enhance or Flourish Excel by AAP/Seachem. This is probably the most simple way, in my experience. Or, you may use a CO2 generator/system, which can vary greatly in cost and CO2 delivery but are much better sources for CO2.
While AAP Enhance & Flourish Excel is claimed to work carbon source for plants, I believe that AAP Enhance & Flourish Excel work more by limiting algae growth on plant leaves, allowing the uptake of carbon naturally produced in a healthy aquarium that would otherwise be used by the algae growing on these leaves
It should be noted that experiences with Glutaraldehyde/Flourish Excel have been mixed.
When Glutaraldehyde is compared to a professional CO2 injection system, there is little contest as per the professional pressurized CO2 system (even the more basic aerosol versions will outperform Glutaraldehyde). Yet, for those who want a simple way to increase plant growth without the hassles of any type of CO2 system, especially with low/medium & even high light plants, this product is often a good choice if only to help the plants out compete algae for naturally occurring bio available carbon/CO2.
I find NilocG Enhance or Flourish Excel CAN be a useful product when used in conjunction with good lighting and ferts (fertilizers).
You could also consider setting up a drip system to slowly add Glutaraldehyde over time instead of by the capful.
Product Resources:
Flourish Excel by Seachem: a premium bioavailable carbon supplement
NilocG Enhance
For more information about Flourish Excel from a Seachem question and answer fact sheet, please follow this link:
Seachem Flourish Excel FAQ
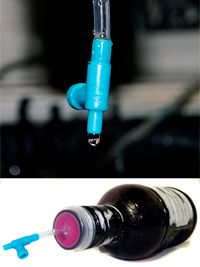
Flourish Excel or NilocG Enhance Drip System Example:
Another way to utilize NilocG Enhance Seachem Flourish Excel for bioavailable carbon (CO2) in a better, staggered way, rather than all at once, is a calibrated drip system.
In this experiment I was able to get 20 drops per minute. I measured 20 drops and this was equal to a ¼ tsp. So 4 minutes would equal 1 tsp. There are 6 tsp in one fluid ounce. So at this rate you will go through a ounce in 24 minutes. Add the correct dosage for your aquarium size then add the water (RO or DI water is best to mix with Flourish).
Example: For a 50 gallon planted aquarium you would add one capful (5 mL) of Flourish Excel (or 5 mL of NilocG Enhance). Then, depending upon how long you would like to stagger the drip would determine the amount of water. For this example I would suggest 20 oz. of water to mix for 8 hours of drip (24 minutes per ounce x 20 ounces water/Flourish Excel solution).
With larger containers, longer dosing times can be achieved.
However, even though Flourish Excel or Enhance can remain active for 24 hours, from my experience I would suggest 8 hours for best results (keeping in mind that CO2 is not utilized by plants after dark as they use oxygen instead during non-photosynthetic periods).
Please see the picture above for an example of this DIY Organic Carbon Drip System.
Natural CO2:
CO2 is naturally provided by fish and other aquatic inhabitants through respiration. Some studies suggest about 30% of CO2 in streams and revers comes from fish respiration.
CO2 is also produced naturally by interaction of alkaline buffers upon acids in the water (often as seep water passes through limestone landscapes
Water passing through terrestrial soils before entering streams & rivers also picks up CO2 that is fixed by bacterial and terrestrial plants. Some information suggests this may be a majors source in some rivers.
The first two "natural sources are easily duplicated in our aquariums while the third is not so easy, which is why we often have to inject CO2 or at least use products such as AAP Enhance.
However, nitrifying bacteria can use carbon dioxide (CO2) for their source of carbon thus, depleting CO2 in the aquarium.
Further Reading:
CO2 emissions change with size of streams and rivers
“Basics of Biofitration from Seachem”
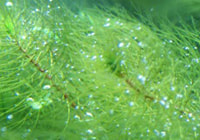
You can sometimes tell if aquarium plants are photosynthesizing by observing the plants. When small bubbles form on the leaves of plants it is a sign that photosynthesis is occurring. This is commonly referred to as pearling.
This picture shows a foxtail with pearling under HO Planted Aquarium capable AAP SHO Lights
To Increase CO2:
Add a CO2 system such as the basic Jungle Fizz Tabs, Floramat System, Hagen, DIY yeast, or a more advanced CO Reactor system.
I personally do not care for the yeast based CO2 system as they are often no more effective than the Fizz Tabs or especially CO2 canister systems with a lot more hassles.
For a more advanced system with a reactor and diffuser, a pressurized CO2 is the next step up.
Utilize bicarbonates or carbonates such as Seachem Alkaline Buffer, baking soda, or similar KH Buffers. Then, use SeaChem Acid Buffer (which utilizes proprietary bisulfate salts which are superior to methods that utilize phosphates) to immediately stabilize pH, counteract the KH Buffers, and produce CO2 as part of the chemical reaction.
Slow acid production with ZooMed Frog Moss, almond leaf, peat, or driftwood can also be used to stabilize pH & counteract the KH Buffers and produce CO2. If ample acid buffers exist, often just the addition of an alkaline (KH) buffer will react with the acid buffer and produce CO2.
Below is a description of the production of CO2 when sodium carbonates (KH buffer) are combined with sodium bisulfate to produce CO2:
>NaHSO4 (sodium bisulfate), Na2CO3 (sodium carbonate/baking soda)
>(HSO4) (sulfuric acid) + H2O -----> (SO4)2- + (H3O)+
>2(HSO4)- + (CO3)2- (carbonate)-----> ?
>CO2 and H2O will be formed.
Often the chemical reaction shown above is naturally occurring in planted aquariums with little intervention by the hobbyist. As long as the aquarium is well-balanced with alkaline & acid buffers both natural (such as Pillow Moss for acid) and added (such as Seachem Alakline Buffer for alkaline). The result renders the use of CO2 generators or products such as Flourish Excel unnecessary.
Add Flourish Excel or NilocG Enhance from AAP
Flourish Excel can be easily dosed along with other liquid "ferts" (fertilizers/plant nutrients) by figuring your weekly dosage mixed with water and adding to upside down soda or water bottle with an air line that has a control valve so that you can regulate the speed of the drip into your aquarium. Generally I use a quart of water with varying amounts of Excel and ferts depending on the aquarium size and plant demands.
See also the "Ferts"/Nutrients section of this article.
It is noteworthy that the best description of how Flourish Excel works is by limiting algae growth on plant leaves, allowing the uptake of carbon naturally produced in a healthy aquarium that would otherwise be used by the algae growing on these leaves.
Product Resources:
Seachem Flourish Excel from AAP
Cut back on surface agitation (but not flow), especially power head venturis or air stones. These can still be set to go on at night by using a timer when plants use oxygen, not CO2.
Keep in mind that circulation is still necessary just watch the surface agitation where CO2 is exchanged for oxygen.
In fact, circulation that is aimed slightly down with high flow propeller/circulations pumps (such as the Seio) can actually keep lighter than water CO2 in the water longer where plants can utilize it.
What is noteworthy is that H2O is more dense than CO2, so CO2 will constantly float to the surface. Simply blasting horizontally will not keep CO2 in the aquarium any more than a vertical current of air will keep a hot air balloon from rising. Thus what is needed is a slight "downdraft" that does not bounce right back up, so positioning propeller/circulation pumps should keep this in mind.
Be careful of organic buildup that can deplete CO2 via nitrification. Thorough and regular water changes are a must for more reasons than this alone.
Some biofilters can add to organic build up (under gravel, and poorly maintained wet/dry and canister filters).
As well many biofilters such as wet/dry can "wear off" your CO2. For this reason the use of sponge filters or better yet, fluidized sand filters, (or both) is advised in planted aquariums utilizing additional CO2.
Product Resources:
Seachem Alkaline Buffer for countering Acid Buffer for CO2 production
Seachem Acid Buffer for countering Alkaline Buffer for CO2 production
ZooMed Frog (Pillow) Moss
Hydro Sponge Aquarium Filters
AAP V² Bio Fluidized Sand Bed Filters
Effect of light on CO2:
If the light is very intense and there isn't a corresponding larger amount of CO2, the light can harm your aquarium plants. Without enough CO2, plants engage in biogenic decalcification that leave deposits of limescale on their leaves.
This however does NOT mean you must artificially add CO2, again think of the PROVEN Walstad Method (previously known as the German Method).
I have kept MANY high light aquariums without adding CO2, however CO2 was added naturally and was not scrubbed off with too much surface agitation, and as well, superior planted aquarium filtration such as FSB Filters were employed.
I also am not advocating to not add CO2 to balance out your strong lighting, simply to know where your aquarium is as per CO2, in part by simply observing your plant health. Also to be wary of many forums that will state as a matter of fact that strong lighting equals that you must have a CO2 system!!!
Too much CO2 without a corresponding amount of light will affect your aquarium plants ability to photosynthesize, and can also harm your fish (fish will be gasping at the surface due to poor oxygen/CO2 ratios in the aquarium).
A balanced tank will generally have more plants than fish.
Further Biogenic Decalcification Information:
Biogenic decalcification is also problem in systems with high carbonate hardness where there is insufficient CO2 in solution.
Adding peat moss, pillow moss or almond leaves can help with this aspect of biogenic decalcification. It will also cut back (but not eliminate) sources of minerals such as ferts or Wonder Shells.
A number of species of aquatic plants (such as Elodea/Anacharis) can absorb the bicarbonate ion, keep the CO2, and excrete hydroxide. They tend to live in crowded conditions where there is not much flow-through of water, and, in good light, they can raise the pH to 10. They often precipitate calcium carbonate on their leaves.
Effect of Aeration (air stones etc.) on CO2.
Aeration, whether it be from air stones, and/or breaking of the surface tension via the splashing effect of a HOB filter is essential for fish to provide necessary oxygen, HOWEVER this can also “drive off/off gas” important CO2 that you are adding to your tank for plants via a CO2 generator or even from normal fish respiration back to a level of equilibrium.
In a tank with CO2 injection or added another way, you are artificially raising the natural levels. The only thing keeping it there is the relatively low gas exchange surface. When you agitate, you increase that gas exchange surface and so it will "off gas" to lower itself back to equilibrium.
Simply put; aeration does NOT lower CO2 BELOW equilibrium, plants do. Aeration DOES lower CO2 down to natural equilibrium whenever it is raised.
This said, even when I inject, I will have surface movement with a circulation pump (such as durable Seio pump) pointed towards the surface (along with another pump aimed down as noted earlier). This may wear off some CO2, but O2 is very important for fish and Redox balance and this agitation also brings in things like Nitrogen.
CO2 Timing
The other problem is since plants themselves use oxygen at night once they stop photosynthesizing, NOT CO2, this can be deadly to fish when plant photosynthesis ceases.
This is especially important if your aquarium has a CO2 system that continues to add CO2 at night which can be poisonous to fish as the plants will not use this CO2. So, any additional CO2 in the tank will be useless to the plants until mornings.
Worse, not only are you wasting CO2 but you may find either dead or suffocating fish. If you see them gasping at the surface, this is a definite sign you need to agitate the surface of the water immediately.
So, here are a few suggestions:
Whether or not you add CO2 to your tank, in heavily planted aquariums the addition of a timer for the control of an air pump running one or more air stones that is set to turn on when the lights go out can help greatly with this problem.
I would NOT recommend placing a filter on a timer as this can cause the destruction of nitrifying bacterial colonies. So, if these filters are creating too much aeration and driving off CO2 during the day, I would suggest changing the configuration until your CO2 levels are where you want them and then use an air pump to regulate CO2/Oxygen levels.
For high end CO2 units, these too should be set to no longer add bubbles of CO2 to your aquarium after your lights go out. For the high end DIY CO2 system pictured below, I would either physically turn of the CO2 at night or purchase a valve (similar to those used in irrigation) that closes the valve on the CO2 canister using a timer.
With high end systems combined with high end lights such as SHO (Super High Output) or GroBeam LED lights (see earlier in the lighting section), I recommend running half the lights for 12 hours and the other half for 8-10 hours. At the same time, set your pressure valve to diffuse some CO2 after the first lights turn on and then open further after all lights are operating (the amount of CO2 required will need to be determined by testing through trial and error).
For more basic CO2 units such as the Floramat (or Jungle), only diffuse CO2 into the “mixing chamber” early in the day so that it is depleted over the course of the day. Or, if using the bubble method, the air pump used here can also be on a timer.
Yeast based CO2 systems are more difficult to regulate in my experience. Depending, on your yeast-based system, adding yeast (or tablets such as the Jungle system) early in the day should allow for enough time for CO2 generation to cease by late in the day.
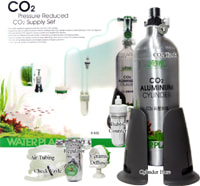
CO2 GENERATORS, Basic, DIY, Professional:
As for CO2 generators, there are many ways of going about this: a DIY, a store bought CO2 generator/reactor, or a CO2 bottle unit.
Entry-level planted aquarium CO2 systems include:
For newbies (and even some advanced aquatic plant hobbyists) I find the Sanders Floramat CO2 Generator to be the most foolproof (although currently unavailable due to aerosol shipping restrictions in the USA).
*Jungle Fizz CO2 System: not as good as the Sanders/Tropic Marin Aerosol canister method, this system uses fizz tablets instead of the CO2 canister as in the Sanders Floramat.
As with the Aerosol CO2, agitating water under the pure CO2 bell will increase the rate of CO2 absorption. Better, though, is to utilize the sponge pre-filter method shown in the next section which works well with the Fizz Tabs.
*Hagen Natural Plant CO2 system: this system is popular with many plant keeping aquarists.
However, (in my experience/opinion) this system is overrated and overpriced (for a yeast method). The "steps" used in the diffusion process of the Hagen unit do not increase CO2 absorption any more than the other basic CO2 kits/systems such as the Sanders Floramat or Jungle system. This is especially true if the DIY diffuser noted in the next section is employed with the Jungle Fizz or even a homemade yeast method. As well, these steps tend to clog with algae and even small snails in some instances.
In my opinion this is a more gimmicky device (the ladder, that is) and is not as reliable in CO2 delivery. That should not be construed to mean that this CO2 system does not work. It does. It simply is not any better than the previously described methods.
That being said, although I have not used a different diffusion method such as the DIY method noted later in this article, this type of DIY diffuser could likely be added to the Hagen CO2 system in place of the ladder/steps and despite the expense when compared to DIY yeast methods, the Hagen yeast packets are quick and simple (but then so are the Fizz Tabs by Jungle too).
*Homemade Yeast Methods: there are many ways to produce CO2 through the use of yeast and sugars which include another method that utilizes Jell-O (Gelatin) for CO2 production.
With these yeast methods the traditional method of diffusion utilizes air line tubing and a Sanders Limewood Air Diffuser or ceramic air stone and for even further/better diffusing of the CO2, the limewood (or ceramic) air diffuser is placed inside a sponge (as pictured in the Diffuser/Reactor section following this section).
This method of diffusion can be used with the Jungle Fizz tabs too. It generally diffuses better than with a traditional diffusion bell/chamber by the manufacturer.
Product references:
*Jungle Fizz CO2 System from AAP
*Sanders Limewood Air Diffuser
Further Information about the Gelatin Method.
(Please note that I have NOT used this method but know of persons that have with
both good a poor results):
• Mix together 2 packs of Jell-O (any flavor, since the end result is CO2 and
nothing more) and 2 cups boiling water. Mix really well until it's all dissolved.
• Add 1.5-2 cups sugar and mix well again.
• Add 2 cups cold water and mix AGAIN. Make sure the sugar is dissolved and
not just collected at the bottom.
• Pour the mixture into the bottle and stick it in the fridge overnight, until it
actually turns to Jell-O.
• Once the Jell-O has hardened, add one cup room temp/lukewarm water and
1/2 tsp yeast. More yeast will produce more CO2. I would suggest starting
with 1/2 tsp. If you find that it's not enough, you can always open the bottle
later and put in some more.
For a DIY yeast powered CO2 Unit:
DIY Yeast CO2
Advanced CO2 Systems:
The Water-Plant CO2 system with refillable CO2 containers is a definite step up from the previously mentioned CO2 systems and DIY methods, yet without the hassle and expense of the professional CO2 systems. This system has a pressure regulator, bubble counter, and top notch diffuser as with many pro systems, but is much simpler. Probably the best choice for all but the most die-hard of advanced planted aquarium enthusiasts.
Product Resource:
Ista Refillable .82L Complete CO2 Set
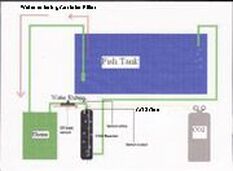
Professional CO2 Systems:
For more advanced/pro plant aquarists (especially with larger aquariums over 100 gallons) I would not use a yeast based system. I would go with an advanced CO2 reactor for freshwater aquarium plants that utilizes pressurized CO2, CO2 reactors, diffusers, pumps with a venturi, and filters such as a canister filter to add the CO2 into the aquarium.
For more advanced/pro plant aquarists (especially with larger aquariums over 100 gallons) I would not use a yeast based system. I would go with an advanced CO2 reactor for freshwater aquarium plants that utilizes pressurized CO2, CO2 reactors, diffusers, pumps with a venturi, and filters such as a canister filter to add the CO2 into the aquarium.
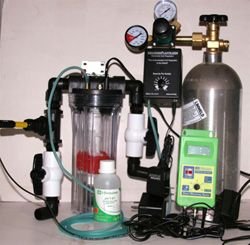
The CO2 system to the left is a top of the line professional system for advanced planted freshwater aquarium keepers. This product is sold by a company not affiliated with this website, however we recommend this type of CO2 system for those who desire a more "high tech" plant keeping CO2 System that is not sold by this website or those affiliated with us.
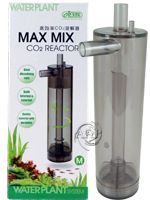
There are many ways to diffuse CO2 into your aquarium from very basic methods that require the CO2 to have some air pressure such as by ceramic air stones or limewood air stones. As well as CO2 bells/chambers, DIY gravel vacuum conversions, or patented professional CO2 reactors such as the "Ista Max Mix CO2 Reactor" pictured to the left.
Product Resource:
Ista Max Mix CO2 Reactor
Product Resource:
Ista Max Mix CO2 Reactor
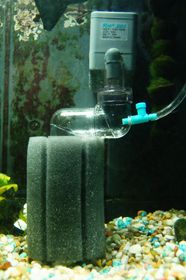
Converted pre-filters as pictured to the right are another basic DIY reactor/diffuser.
This sponge pre-filter method was introduced to me by an aquarium plant enthusiast friend in 2007, but I forgot about it until September of 2011 (after a similar method reminded me of it and I decided I would put one together myself).
This method utilizes a Filter Max #2 Pre-Filter with a small hole drilled to add a Lee's air line control valve, then an airline check valve as close to the airline control valve as possible. From the check valve, the airline goes to the source of the CO2, whether a Jungle Fizz Tablet Bottle (which is what I used to give it a try), yeast CO2 generator, gelatin, or, in my friend's, case a fully pressurized CO2 tank with a regulator.
You then connect a relatively slow pump such as the Rio 200 (138 gph) to what would normally be the pump pick-up, but in this case, the flow is directed downward so as to trap the CO2.
While, as of this article update, I have not used this method enough to make a judgment, my friend has and has noted marked increases in his CO2 using the same generator method, with the only difference being this DIY diffuser.
Product References:
Lee's Part 14104 air line control valve
Jungle Fizz Tablet CO2 System for Aquarium Plants
Rio 200 (138 gph)
Further Commentary Regarding CO2 Systems:
CO2 generators can greatly improve your planted aquarium's growth and overall plant health. Yet, I do not want beginners to feel that these are a must.
As with many devices in aquarium keeping, (such as UV sterilizers or protein skimmers) these are useful tools. There are, of course, many discussions about just how useful they are. I have no problem with that. What is frustrating to me is the amount of misinformation on both sides of the argument.
One argument against these CO2 units is that running CO2 on planted tanks is not “natural”. This is the same argument against UV Sterilizers (which I can confidently say I have researched VERY extensively). However the aquarium is a closed environment, and in this environment it is sometimes necessary to use artificial means to achieve certain results such as strong plant growth with CO2 units or disease prevention, healthy redox, and “unnaturally clear” water with UV sterilizers.
Some plants such as Rotala macrandra are nearly impossible to grow without added CO2. CO2 units also help with “flattening” plant growth within the aquarium where, otherwise, some plants grow only to the surface with thin stems in order to seek out CO2 in the air.
Another advantage of CO2 units (of any type) is that they will help with weaknesses in other areas of plant care such as low organic carbon and other nutrient availability.
The bottom line is, these can be very useful, but they are not essential in all planted aquarium applications such as some Amazon Biotopes.
If you are a beginner and these devices seem overwhelming, try products such as NilocG Enhance or Flourish Excel and follow some of the tips earlier in this article as to raising CO2. Also the Jungle CO2 Fizz Tabs is a reasonably good CO2 unit for beginning plant keepers.
However, for really serious planted aquarium keepers, the CO2 reactor systems (many better systems can be DIY) are hard to beat.
Product references:
NilocG Enhance
Seachem Flourish Excel bioavailable carbon supplement
Jungle CO2 Fizz Tabs for planted aquariums
MORE ABOUT CO2
Of course, there are dangers as well. It is possible to diffuse too much CO2 into your aquarium which can be dangerous to your fish. Levels over 30 ppm should be avoided!
Though 3 ppm of CO2 is standard (as an established scientific fact), 10-25 ppm CO2 is considered optimal for the use of CO2 Units. This, of course, is the subject of an ongoing debate. Here is an outside article discussing optimal CO2 levels:
The Krib: CO2 Concentration
You can calculate CO2 levels using this formula:
CO2 (in ppm) = 3 times KH (as measured in degrees of carbonate hardness ONLY, not Phosphates!) times a factor of 10 deviation (+ lower/ - higher) from a PH of 7.0.
Example: a KH of 1 with a pH of 6.0 would produce a CO2 level of 30 (1 * 3 * 10 = 30).
A KH of 1 with a pH of 8.0 would produce a CO2 level of .3 (1 * 3 * .10 = .3) For conversion of KH: 17.9 ppm = 1 dKH.
Please note that the presence of ANY phosphates will make this calculation fail.
One more note: pH will climb during peak photosynthesis, especially in tanks with low hardness (yes hardness, not KH!)
Another way to test CO2 is with CO2 test kits (as well as droppers discussed below).

Here are the recommended levels for a planted aquarium with different KH levels.
*10-15 ppm (mg/L) at 5 dKH (90 ppm KH)
*15-30 ppm at 10 dKH (180 ppm KH)
*30-40 ppm at 15 dKH (270 ppm KH)
Product Resource:
ISTA CO2 Indicator Tester
*10-15 ppm (mg/L) at 5 dKH (90 ppm KH)
*15-30 ppm at 10 dKH (180 ppm KH)
*30-40 ppm at 15 dKH (270 ppm KH)
Product Resource:
ISTA CO2 Indicator Tester
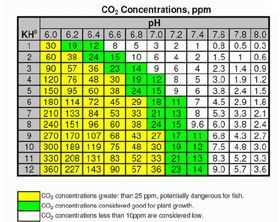
Here is an interesting CO2 Chart and Calculator for the relationship between KH and pH as it relates to CO2 in planted aquariums
For a balanced discussion about CO2 generators, I recommend this group:
Everything Aquatic: a forum discussion without anecdotal arguments
For a balanced discussion about CO2 generators, I recommend this group:
Everything Aquatic: a forum discussion without anecdotal arguments
Nutrients
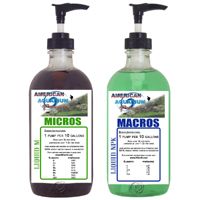
Brief Overview: Plant nutrients include nitrogen and phosphorous from fish food and waste and potassium that we add through supplements of nutrients or "ferts" as they are referred to by many hobbyists.
Some trace elements, including calcium, magnesium, and iron are also essential. In the case of iron, too much in the water column can and often will cause algae problems (I prefer iron to be more available in the substrate.
Nutrients (ferts) can be added to the substrate, water, or both.
Here are basic planted aquarium water parameters (and some suggestions for these elements/nutrients):
Let me first note that with the popularity of the "Walstad Method" of aquarium keeping there is one mistake/misconception that often occurs, namely that the plants in a closed environment will sustain all of the proper chemistry with maybe a water change a few times per year. This misconception often leads to depletion of essential KH buffers and equally if not more important positive mineral ions.
This BTW does not mean one cannot maintain a vibrant planted tank as per this method, just that it is quite easy to outstrip natural bio available nutrients in a closed system, hence my comments.
The facts are: in this closed system, without the addition of KH buffers and just as importantly mineral supplements, your fishes' health will be compromised, despite the claims of others.
Aiming for artificially low GH levels in a misguided attempt to replicate Amazon or similar bio-topes has been proven to be folly.
For a better understand of why this is the case, please read the following articles:
Aquarium Chemistry: The importance of maintaining healthy positive calcium levels.
From this cited article:
"This closed environment aspect is missed by many who promote methods such as Biotope or natural environment aquariums which simulate an environment that is closes to nature.
While I am certainly not against a "natural" environment for Amazon River or similar type fish, just understand the importance of proper levels of mineral ions. No one should ignore the FACT that these fish still require mineral cations for proper health and Redox balance! Correct levels of mineral cations have been proven important in many places throughout my articles.
Unlike in an open system that have mountains and rivers replenishing these minerals, these mineral cations are often driven out with many methods of establishing a Biotope aquarium. The aquarium keeper is unlikely to know how important these proper trace minerals are for long term health of the fish."
Further Reading:
The Importance of Aquarium Redox Balance
IMPORTANT!
Now, with other methods of adding nutrients or "ferts", such as the "The Estimative Index of Dosing" (popularized by Tom Barr), the ferts, which are added, with the large water changes performed, generally should take of these minerals and it is a non-issue (water changes are part of the course of this method, in part to control temporary and artificially high nitrates).
Reference:
The Estimative Index of Dosing, or No Need for Test Kits
If you are into the high end world of explosive plant growth where the aquarium is more about the plants than the fish, the above method might be for you, so please read!
For PROFESSIONAL GRADE planted aquarium liquid fertilizer products that are best suited to the "Estimative Index of Dosing".
Products designed for persons who want to have a more advanced planted aquarium without the hassles need for a degree in science to do so. Consider these products too:
NilocG Aquatics; High Plant Growth Planted Tank Liquid Ferts
These products work for both low light and high light planted aquariums, just different dosages.
*GH (general hardness): 100 ppm or sometimes higher; this is more important than many realize for planted aquariums.
“During photosynthesis, a rise in pH can occur in water with low alkalinity (20 to 50 mg/L) or in water with moderate to high bicarbonate alkalinity (75 to 200 mg/L) that has less than 25 mg/L hardness”.
This is an often misunderstood aspect of aquarium plant keeping.
There is so much anecdotal information that is out of date with more current aquarium/plant biochemistry information. Not only do plants need many of the minerals found in GH, but, just as important, potentially dangerous upward pH swings can occur if your GH is much below 50 ppm during peak plant photosynthesis.
For example, I observed a pH of 6.8 in the morning and then a pH of 7.4 in the afternoon in a tank where GH was low or almost non-existent.
Please reference this link for a study from Texas A&M University about the subject of GH/pH stability during photosynthesis:
Interactions of pH, Carbon Dioxide, Alkalinity and Hardness
*KH (carbonate hardness): 50 – 100 ppm - this is important for good CO2 assimilation. I recommend Seachem Alkaline Plant Buffer in combination with Seachem Acid Buffer for use in planted aquariums that tend towards low KH. Please note, an acid buffer is often not necessary in planted aquariums since natural acid buffers may already be present.
Please Reference:
Aquarium Chemistry: KH Buffers - an explanation of common buffers (including dosing chart) (very important!)
Product references:
*Seachem Alkaline Plant Buffer - planted aquarium KH control
*Seachem Acid Buffer for RO water and KH balance
*CO2 (carbon dioxide): 20-25 ppm.
Methods for adding include ISTA Disposable CO2 Generator, Professional Pressurized CO2 units, NilocG Enhance, Seachem Flourish Excel
Product references:
ISTA Advanced CO2 Generator and diffuser for plants
Seachem Flourish Excel
NilocgG Enhance
*K+ (potassium): 10-30 ppm.
Sources include the professional AAP Grow-It, Seachem Flourish, & Flourish Potassium, fish food (adequately fed)
Product resources:
*Seachem Flourish & Flourish Potassium
NilocG Aquatics; Planted Tank Liquid Ferts; Including Potassium
*PO4 (phosphate): 1.0-2.0 ppm. Anything higher can feed algae more than plants.
However, since phosphorous/phosphates facilitates root growth, if phosphates are too low in a fish tank, it might actually aid in algae growth, since algae have no roots and could outperform poorly rooted plants for nutrients.
For "too high" levels, consider products such as API Phosphate Remover - Phos-Zorb or NPX Bioplastics Nitrate & Phosphate Reducing Polymer Media (which must be used in a fluidized sand bed aquarium filter)
My experience as well as research is that it is very rare for an average healthy planted aquarium with a normal bio load (especially using the Walstad or German Method) should need to have phosphates added to the aquarium. However when going with high tech, high light, "crazy" plant growth methods such as similarly advocated in "The Estimative Index of Dosing Method".
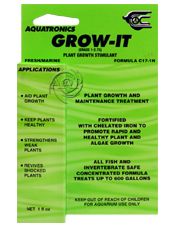
Product references/resources:
AAP Grow-It; Time tested Professional Choice
NilocG Aquatics; High Plant Growth Planted Tank Liquid Ferts; Including Phosphates
API Phosphate Remover - Phos-Zorb
NPX Bioplastics Nitrate & Phosphate Reducing Polymer Media
AAP/TMC Fluidized Sand Bed Aquarium Filter
*Fe (iron): 0.2-0.5 ppm.
Supplied by Flourite Substrate or similar, plant tablets such as Jungle, or best supplied by specific iron supplements such as Seachem Flourish Iron.
Symptoms of iron deficiency in plants can be chlorosis (yellowing) of the tissue between veins and short and slender stems (most often in new growth). Plants such as Rotala and Ludwigia will often NOT display red colors when iron is lacking. Clay/laterite substrate (which are high in iron) can help in the case of these plants.
It is also noteworthy that in acidic environments phosphate ions react with Iron and make iron less soluble and thus less available. Therefore if one require more iron, slightly alkaline values are more desirable.
Product references:
*SeaChem Flourite
*NilocG Aquatics; High Plant Growth Planted Tank Liquid Ferts; Including Iron
*Seachem Flourish Iron aquarium plant supplement, ferrous gluconate
An old trick is to bury a nail in the substrate near the plant roots whereby the rusting nail will provide the necessary iron. I have seen this work well and despite some anecdotal answer at "Yahoo Answers", there is no scientific evidence that rust in small quantities such as a nail would provide will harm fish (it anything it will improve Redox balance with mineral Cations!!)
This said, I think newer methods such as balanced supplements are the way to go for added iron
*Ca (calcium): 100+ ppm.
Supplied by AAP Wonder Shells, Seachem Equilibrium, water changes, Seachem Flourish. Deficiencies in calcium can cause leaf curling or growth deformations.
Product references:
AAP Wonder Shells (the only source for fresh Wonder Shells online)
Seachem Flourish
*NO3 (nitrates): 10 to 15 ppm is the general consensus for nitrate levels in a planted freshwater aquarium so as to allow for adequate nitrates for plant growth, but not too much for high algae growth. You should keep the level below 30 ppm for healthy fish.
Nitrates come from fish waste/food, potassium nitrate (KNO3). You can lower them by having more plants, or performing aquarium maintenance like water changes or cleaning gravel and filters.
What plants utilize nitrates/nitrogen for is leaf growth, which in turn maximizes surface area for essential photosynthesis.
Although I have not performed controlled tests, my observations are that nitrate levels that are too low will stunt plant growth and possibly even encourage certain algae (such as green spot), while higher nitrate levels will encourage algae to outperform plants and take over an aquarium.
As with phosphates, the need to add additional nitrate (nitrogen) in a healthy normal bio load aquarium is not usually necessary with the exception of the "The Estimative Index of Dosing Method".
Product resources:
Seachem Flourish & Flourish Nitrogen
NilocG Aquatics; High Plant Growth Planted Tank Liquid Ferts; Including Nitrogen
For further information on nitrates:
Aquarium Nitrates, Control
Methods to Introduce Nutrients to Your Planted Aquarium:
There are many methods to accomplish this, so I will not provide anything close to an exhaustive list. Rather, I will provide a few suggestions, as well as an excellent outside resource.
(1) Many nutrients can simply be supplied by products such as Flourish Root Tabs for planted aquariums (or other brands). These will provide most of the important nutrients directly where plants with established root systems need them.
Root tabs are also helpful because it keeps the nutrients in the substrate and not in the water column where it would otherwise encourage algae. Some plants, like Amazon swords, feed exclusively via their roots.
In the case of trace elements, Wonder Shells can be an easy source.
Product Resources:
Wonder Shells, Unique Version ONLY from AAP
Seachem Flourish Root Tabs for planted aquariums
(2) Liquid Nutrients: these can be the simple regular dosing of Flourish (which, as with root tabs, is a non-specific overall nutrient supplement). Or, it can be a bit more complicated with individual nutrients such as Flourish Iron, Potassium, etc.
For simplification, especially when using multiple specific nutrients/ferts, as well as Flourish Excel, a DIY drip system can be utilized.
Use a soda or water bottle and add an air line with control valve. Then, turn the bottle upside down and you can regulate the speed of the drip into your aquarium. Next, figure out your weekly dosage of nutrients and mix it with distilled mixed water that goes inside the bottle. By adjusting the control valve, you can get a slow drip of nutrients into your aquarium.
Generally I use a quart of water with the variable being higher amounts of Excel and ferts in this mix as per the aquarium size and plant demands. The picture/link to the left gives an example of a control valve I use.
As an example, for a 60 gallon aquarium using regular Flourish and Flourish Excel, I would mix 5 ml of Flourish and 40 ml of Flourish Excel to this quart of water. Then, I establish a drip rate for one week. Generally, establishing the drip rate is the most difficult aspect of this method. I usually experiment with 4 to 5 ounces of plain water (one day's worth) until I get it to about where it is empty in a single day.
I personally think this dosing system works as well as any other system and, since it isn't very costly, it's at least worth giving a try.
(3) PPS Pro (Perpetual Preservation System): this system is very easy to use and is designed specifically for aquascapers who want a system that performs well, does not need much testing and tweaking. Additionally, it works with all lights and substrates, little or no water changes and/or large water changes.
Click below for a much more in-depth article:
Perpetual Preservation System
Further Explanation of Aquatic Plant Nutrients & Methods:
*Maintaining a moderate level of GH (100 ppm >) is not only important for fish, it is important for plants as well.
Calcium and magnesium, which are both found in GH, are very important to plants. Deficiencies in magnesium will inhibit the plants ability to produce chlorophyll causing pale leaves.
It has also been shown that carbonates produced by plants during hours of peak photosynthesis can raise pH substantially, which can be harmful to fish present. However, this is buffered by an adequate GH level.
Source:
Interactions of pH, Carbon Dioxide, Alkalinity and Hardness
Also, KH (carbonate hardness) is important for the proper assimilation of CO2 as I have observed in many of the aquariums I have maintained. When the KH has dropped below 50 ppm (3 dKH), carbon dioxide usage goes down, which results in retarded plant growth (and often increased algae growth). Baking soda can be used in a pinch here, however, I recommend more complete buffers such as Seachem's Alkaline Plant Buffer.
For more about calcium and magnesium, as well as KH, please read this article:
CALCIUM, ELECTROLYTES, AND MAGNESIUM IN AQUARIUMS
Although, not directly about aquarium plants, this article has good information about the very misunderstood topic of positively charged minerals such as calcium, magnesium, potassium and their bioavailability:
Ions, Nutrition and all that “Scary” Chemistry
*I need to emphasize that feeding your fish a high quality food will help. I suggest one based in aquatic ingredients, less cereal, and less "byproducts". This will help your fish because they will be healthier and less prone to disease. They will also be more colorful and grow more! But, many don't realize how good fish food also benefits plants.
In a well-planted tank, any food that doesn't get eaten will make it's way to the substrate and become fertilizer. Likewise, as the food passes through the fish, some minerals and nutrients will also be passed on to plants. So, a higher quality food will necessarily mean your plants are better fed, too.
This is all the more reason to give your fish high quality food, and never one that uses fish meal made from the by-products of human food processing. The popular foods by Tetra are made this way.
A good example of a quality fish food is Spirulina 20 bor Gamma Nutrshots from AAP.
For more about quality fish food ingredients, please read this article:
Quality Fish Food: What ingredients are needed for proper fish nutrition
Product Resources:
*Spirulina 20, at AAP
*Gamma Nutrashots Premium Fish Food (the ONLY AUTHORIZED online dealer is AAP)
*Use of Activated Carbon and its possible effect on plant fertilizers.
This is often a controversial subject. However, the simple facts are that only chelated nutrients, such as iron or minerals, that have lost their positive charge can be removed by activated carbon.
Please see this in-depth article for a much better understanding of the positives and negatives of activated carbon use:
Aquarium Answers: Use of Activated Carbon in Planted Aquariums, Ponds
*Cleaning:
When cleaning your planted aquarium, do NOT over vacuum (this differs from a non planted aquarium despite some rather uninformed YouTube comments I have read, where by many do not understand that many planted aquarium methods/traditions require different, little, or no water changes).
Try and leave some organic mulm behind for eventual nitrate production. Also do NOT rinse your bio filter media such as sponges as thoroughly as you would in a non-planted aquarium as again this will aid in necessary nitrate production.
A planted tank will also tend to consume more of your KH due to bio decomposition and the resulting acid production, so keep a close check on this parameter. GH is not depleted as readily, but still gets used by plants and de-composition, however the positive charge of many GH components such as Calcium are often rapidly consumed.
For further information:
*Aquarium Cleaning
*Filtration & Nutrients/Ferts: Some filter types also effect nitrates, and in the end, plants: fluidized sand bed filters are just about the most efficient aerobic bio filters, bar none, without the side effects of some bio filters such as UG filters, or even wet/dry, of increasing DOC (dissolved organic compounds) or organic mulm.
Neither a fluidized filter, nor a sponge filter, strips CO2 like many biofilters can, especially wet/dry filters.
For this reason, I have found the fluidized sand bed filters, followed by sponge filters, to be about the best filters to use for planted freshwater aquariums. This is, in part, due to the lack of these problems, while supplying adequate nitrates to plants.
Product references:
AAP/TMC V2 Fluidized Sand Bed Filters
Sponge Filters by ATI
For more about nutrients, please refer to our Algae section further down in the article.
Plant Dips
It is always a good idea to dip your plants prior to adding them to your aquarium.
This is done to prevent unwanted snails, or foreign strains of algae, and disease. Try one (or more if necessary) of the following:
Flourish Excel, which contains aldehydes, can be used in a 20 minute dip at 20 ml. per 40 L (10 gallons).
This is effective for algae, many diseases, and will work somewhat for snails.
Bleach used in a 20 parts water to 1 part bleach for 2-3 minutes for delicate plants and 4-5 minutes for broad leaf plants. Follow this with a quick dip in sodium thiosulfate, or another de-chlorinator/water mixture.
Add enough potassium permanganate to water such that it turns your water pink. Dip your plants in this solution for 20 minutes.
This is also effective for many algae, diseases, and usually snails.
Live Plants
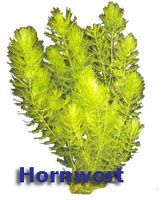
• Hornwort (Ceratophyllum demersun)
* This is an easy to grow, fully aquatic plant. It aids in nitrogenous waste removal (they are literal "nitrate sponges").
Hornwort prefers neutral or alkaline waters.
The one negative with this plant is that the Hornwort commercially available is not a true tropical plant and needs to be adapted slowly for aquarium use. This plant can be either floated or planted (weights are useful for initial planting).
In the tropical version (which is not commonly available) this plant is considered a strictly a floating plant.
* Low to moderate light requirements.
* This is also a plant that MAY be kept with goldfish as they tend to not bother this plant. The needles of this plant are usually too spiky for the them to eat.

Java Moss (Vesicularia dubyana)
*Easy to grow, a tropical plant from Southeast Asia.
It will grow in low light. A little goes a long way. The thinner this plant is spread over rocks and driftwood, the better it will root itself and the healthier it will look as it grows on your decor. This can take over your aquarium substrate in particular.
*Low to high lighting requirements (high is necessary for strong growth, especially if used in breeding environments or Amano tanks).
*Java Moss has wide tolerances as well. It can grow in temperatures between 64 - 86 F (18 - 30 C) & pH between 5.0 - 8.0.
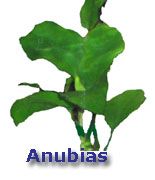
Dwarf Anubias (Anubias nana)
*Easy to grow, tropical plant from West Africa.
It will grow in low to high light, and prefers a rich soil (sand) base.
Dwarf Anubias is one of the easier plants to grow. This plant is so hardy that it can even survive out of water.
Dwarf Anubias needs very little light and isn't very specific about water conditions.
The only negatives are that they grow quite slowly and are vulnerable to beard algae. As in all Anubias species, they are grown from a rhizome (horizontal stem of a plant that often sends out roots and shoots from its nodes).
* Low to high lighting requirements
* Anubias Nana have wide tolerances, growing in temperatures between 70 - 86 F (21 - 30 C) and very wide pH between 5.0 - 8.6.
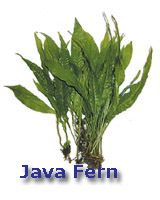
Java Fern (Microsorum pteropus)
* Easy to grow, tropical plant from Southeast Asia.
It prefers low light, and needs no soil. The Java Fern is quite undemanding and simple to cultivate, even doing well without extra nutrients or carbon (CO2).
The Java Fern is also an ideal plant to use in aquariums that have burrowing fishes since they will usually not bother this plant.
This plant should not be buried in the gravel (which also makes them ideal for UG filters), but rather placed on rocks and driftwood, leaving its roots loose in the water column.
Java Ferns reproduce by daughter plants that are born on the edge of the leaves of the mother plant. The daughter plants will eventually break off and find their own place in the environment.
* Another possible plant for goldfish
* Low to moderate light requirements, depending upon the species of Java Fern. The common Microsorum pteropus requires only very low light while the Philippine version requires moderate lighting.
* As with Java Moss, Java Ferns have wide tolerances as well, growing in temperatures between 64 - 86 F (18 - 30 C) & pH between 5.0 - 8.0.
Water Sprite (Ceratopteris thalictroides)
* Easy to grow, tropical plant (from various regions).
It does well in average light and simple substrates (sand/gravel).
* A great plant for removing excess nutrients in the water. New leaves unfurl from the base of the plant into lacy fronds. It needs regular trimming to stay looking nice. Be aware that fish love to munch on this plant, but it grows fast.
- Will survive in low light, but thrives in moderate to high light.
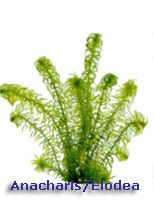
Anacharis/Elodea (Egeria densa)
* A relatively easy to grow plant that is good for beginners.
Anacharis has branching stems covered in bunches of linear, slightly curled leaves. Anacharis can be anchored in the substrate by its roots.
It will also grow when floating freely. This plant does well in both cold and warm water and is excellent for livebearers.
Caution should be used when planting Anacharis in a tank with goldfish as they often will nibble at it.
* Anacharis does best in moderate lighting with added nutrients and CO2 (Flourish Excel is often adequate). Under optimum conditions, this plant will grow rapidly and add a good deal of oxygen during the hours of photosynthesis.
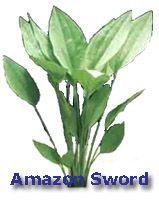
Amazon Sword (Echinodorus amazonicus)
* This is a moderately difficult to grow plant from Brazil.
Amazon Swords require medium to high lighting and rich substrates (such as SeaChem Flourite) because they can only get nutrients through their roots.
These plants are relatively hardy and take root easily once they adjust to the new tank.
Amazon Swords can be potted (like house plants, in an aquarium) and in aquarium gravel, as both ways work very well. They have large root systems that can overwhelm other aquarium plants
Product Resource:
*SeaChem Flourite
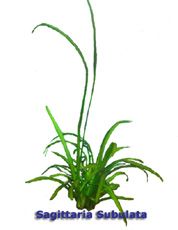
Narrow Leaf Sagittaria (Sagittaria subulata)
* Sagittaria subulata is an easy to grow rosette plant that will thrive in most planted freshwater aquariums.
The plant typically grows to a height of 8 inches (up to 16 inches in high light aquariums).
* Narrow Leaf Sagittaria will grow quickly and propagates via runners which will form a dense grouping producing 2 - 3 leaves and one runner per month.
* To achieve strong growth, the substrate should contain iron, while strong lighting is less of a factor.
Use of products such as Flourish Root Tabs, other similar root tabs, is an easy and reliable way to provide a healthy substrate with proper nutrients root feeders like Sagittaria and Amazon swords.
* Sagittaria subulata will thrive in a wide range of pH and water hardness, including brackish aquariums.
These plants originate from South America and the Eastern U.S.
Product references:
Strong Lighting - SHO Super High Output 6400K Lights
SeaChem Flourish Root Tabs
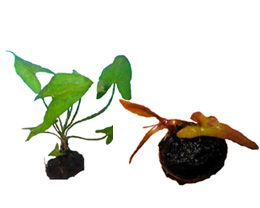
Dwarf Lily (Nuphar stellata)
* This plant is easy to moderately difficult to grow, though patience is required.
These are usually sold as bulbs as these are true lilys.
Leaf color varies from green, to brown, to shades of red which can add a pop of color to a planted tank.
The growth of these plants parallels Banana Plants (which is another type of Dwarf Lily). Often these Lily bulbs are sold by stores such as Walmart as Assorted “Aponogeton Bulbs” (usually dry) and many will never sprout (usually anywhere from 1/5 to 1/2 may not sprout).
* These are actually better to keep under low to moderate light. If not, you will end up with a large green common lily that looks more appropriate in a pond than an aquarium.
* Also Plecos do NOT do well with lilys. They will usually eat them faster than they can grow.
* These bulbs should not be planted, although plant soils such as SeaChem Flourite can be added to the area around the bulb to aid in nutrients for the sprouting plant
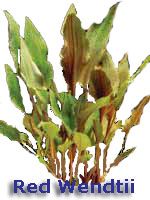
• Wendtii, Red (Cryptocoryne wendtii)
* This plant is easy to grow and is found in Southeast Asia.
These are excellent beginner plants that only require low light, tolerate soft to very hard water, and very wide pH range 6.0 – 9.0
* This plant is easy to grow and is found in Southeast Asia.
These are excellent beginner plants that only require low light, tolerate soft to very hard water, and very wide pH range 6.0 – 9.0
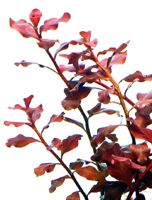
Red Ludwigia (Ludwigia repens)
* This plant is easy to grow and is found in Southern North America. It occurs naturally in swampier regions, such as those of lakes, ponds, and other areas of low intensity/stagnant water so high water movement is not needed..
The Red Ludwgia is one of the easier red plants to grow in the aquarium, being able to grow in moderate light conditions and with little added CO2. These too are excellent beginner plants with a fast growth rate with reasonable care. These plants also tolerate a pH range 6.5 – 7.5
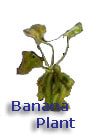
Aquarium Banana Plant (Nymphoides aquatica)
* This is an easy to moderate growing plant from the Southeast USA.
Banana Plants require moderate to high lighting with no special substrate requirements. It is usually an easy plant to take care of and grow.
Banana Plants adapt to most water conditions.
* Do not make the mistake of burying these plants too deep.
Banana Plants send leaves up approximately 8-12 cm high every 4 to 5 days. It will also grow replica plants.
* A good plant for both the beginner and serious hobbyist
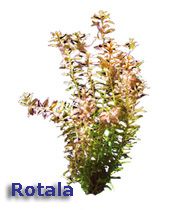
Rotala macrandra
* This is a moderate to difficult growing plant from the Far East: Laos, Vietnam, etc.
Rotala macrandra requires strong light, soft water (pH 5-7), CO2, and pruning to thrive and look its best in aquariums.
Without CO2 these plants will tend to send thin stems to the surface and never really fill out.
Another species of Rotala that is relatively new to the planted aquarium keeping hobby is the "Rotála índica"
For more about this species:
Rotala indica; Indian toothcu
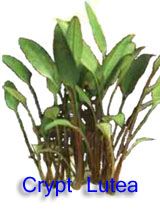
Cryptocoryne lutea (“Giant Mother Plant”)
* Moderately difficult to grow, this plant from Southeast Asia, needs to be planted and fertilized. Many have had success with this plant in regular gravel.
Crypt lutea may go through a period of die-off when first planted, but it recovers after a couple of weeks.
This plant spreads its roots very far, so if you remove it, be careful to not pull it too hard or you may destroy the root structure.
* Crypt lutea tolerates wide variances in temperature, hardness, pH, and lighting which makes this plant easy to grow in many different tank environments.
As noted earlier, transplantations and fertilization are the more difficult aspect of this plant.
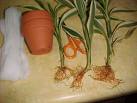
Plants I generally recommend not to have:
Any terrestrial plant adapted to aquariums (plants that can't be grown submersed indefinitely) such as Mondo Grass, Purple Waffle, Aluminum Plant or Peace Lilies.
I will make the exception that the above plants make excellent bog plants when the roots are kept under water (absorbing nutrients for better tank health) while the leaves are out of the water.
One more exception would be the use of Dracaena/Dracena (picture above left) when properly prepared and potted.
With this in mind, all of these above mentioned plants are better used in a vivarium where the leaves are above water rather than fully submerged in the aquarium.
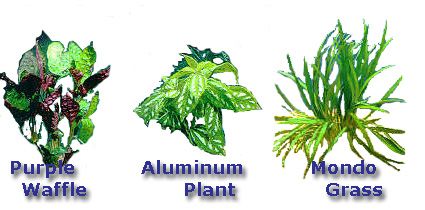
Other plants I do not recommend are Cabomba as these non-tropical plants have high light requirements and tend to be difficult in warm aquarium environments which often results in this plant breaking apart and causing a mess.
Purchase Live Plants
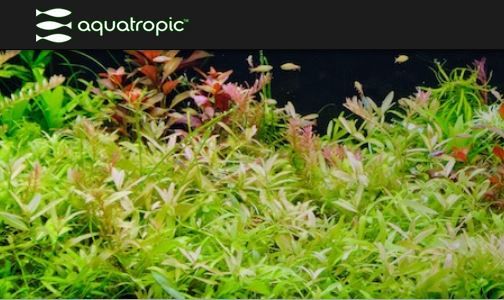
Aquatropic Tropica Premium Tissue Culture Live Plants via AAP
Small plants with great success. 1•2•Grow!
Our very young plants cultivated and delivered directly from our laboratory. The plants are guaranteed to be free from snails, algae and pesticides and therefore are totally harmless for sensitive shrimp and fish. The range offers unique plants!
Success with your aquarium depends largely on the proper plant choice. In a 1•2•Grow! cup you buy a myriad of plants which can be divided into small portions and cover a larger area. Plants are compact from the start so you will experience a dense and beautiful growth, if you give them the right fertilizer and CO2 from the start! The range is perfect for small and medium sized aquariums, and your patience will be rewarded
STEPS:
Carefully take the plant out of the cup and rinse off the growing media under the tap,
Split the plant in 6-8 portions using your fingers or sharp scissors (for small foreground plants).
Plant portions into the substrate using tweezers. Then watch them grow!
TERMS:
Guaranteed live arrival with picture provided if otherwise
Further Information:
Tropica Plants Information
Product Research:
Tropica Live Plants
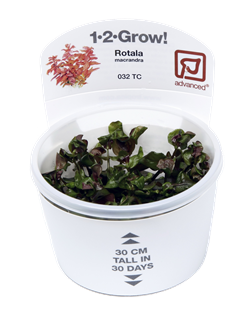
Algae Control
Our "Aquarium/Pond Answers" website has a more detailed Algae Control Article as well as an article specifically about Cyanobacteria:
Control of Problem Aquarium Algae; BBA, Hair, Brown Diatom, and more
Cyanobacteria; Blue Green/Red Slime Algae in Aquariums & Ponds
Algae control in a tank is often most simply accomplished by having plants out compete the algae for nutrients.
One way to control algae is to add CO2 (or bio-available carbon).
This will often retard many unwanted algae growth. But, if you stop adding CO2, or carbon, and find the algae quickly grows out of control, then it is likely an indication that there are other problems contributing to this including:
*Unusable/unavailable nutrients (micronutrients and macronutrients).
Here is a list of important nutrients (listed in recommended added solution, not ppm, as stated earlier in the article):
potassium (often available as soluble potash)- .37%, iron- .32%, sulfur- .27%, sodium- .13%, calcium- .14%, magnesium- .11%, nitrogen- .07%, available phosphate- .01%, boron- .009%, cobalt- 0004%, copper- .0001%, zinc- .0007% molybdenum- .0009%,.
Here are a few sources:
AAP Flourish
AAP NilocG Aquatics; High Plant Growth Planted Tank Liquid Ferts *PMDD
Regular AAP Wonder Shells
API Root Tabs
Not all these sources have all the required nutrients. Many can be mixed as you find your own success.
Much has been published lately about the addition of PO4 (phosphates) to control algae. However, I believe this is only partially correct and based on some false assumptions.
Phosphates (PO4) along with nitrate (NO3) and potassium are important macronutrients that need to be in balance.
I have found that simply changing water will control algae by adding many of these macronutrients (assuming proper mineralization of new water).
What is happening is that the algae are much better equipped than higher plants to compete in conditions of low nutrients. The addition of these nutrients allows the plants to better compete for more of the nutrients.
Adding only PO4 does not bring these macronutrients into balance. Even though many claim this solved their problem, they have not run a control group to see if this was only part of the equation. There may have been other variables that controlled the algae.
Poor substrate for healthy plant growth (only certain plants!).
Make sure your substrate is rich in iron (Fe). Iron is the most important trace element.
Your tank substrate should contain a reasonable amount of iron. Liquid iron will, if overdosed, favor hair algae. It can be added through tablets, iron rich fertilizers, and through substrates like Eco Complete, Laterite and Fluorite.
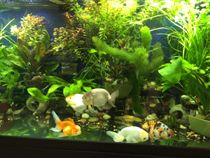
Important! - Poor lighting
Lighting that does not allow plants to compete with algae is a factor, as well. In fact often improving your light source will make all the difference.
It is noteworthy that is often NOT the quantity of the light, but the QUALITY of the light as MOST aquarium lights have poor PUR that includes excess green, and yellow light as well as blue out of balance with red light energy.
In fact my extensive aquarium maintenance experience going all the way back to when actinic blue lights first became popular showed me that excess blue light is quite often a major contributor to excess algae growth, YET many modern lights make just this mistake!
Here is a quote from a client, the owner of the 100 gallon aquarium pictured to the above/left that switched from T5 to very high PUR GroBeam LED Light Strips:
" I use weekly Seachem Flourish fertilizer and iron. I use excel a couple times a week. Usually it is standard dosing but if an algae problem should arise I will on occasionally double or triple dose once.
The algae issue has been MUCH less with the GroBeam LED lights then prior T5 lighting."
As an example, poor quality or low lighting encourages brown diatom algae. Too much actinic light can encourage the growth of BBA algae over plant growth.
It is worth noting that strong blue light will cause plant growth to be more compact and bushy, and will also tend to promote algae growth. So, for the best plant growth with the lowest green algae growth, it is best to balance 2/3 red to 1/3 blue light emissions.
I do not agree with the method of darkening a tank for a few days because plants often have higher light requirements than algae (in part due to their complexity).
This only gives the algae more time to out compete plants because the dark will hurt the plants more than the algae!
Information resource:
Aquarium Lighting; Facts and Information
High or too low nitrates also contribute to algae growth.
Nitrates should be above 15 ppm for plants, but not above 40 ppm as I have seen in many aquariums with excessive algae growth. (Truthfully, though, high nitrates are rarely a problem in tanks with healthy plant growth).
If nitrates are too low, plants will starve for this important macronutrient.
Aquarium Cleaning Frequency:
Often increasing the frequency (even to twice per week) will improve conditions in the aquarium so as to allow plants to out compete algae.
In part, this improves the macronutrient balance, as discussed above, (as well as improvements in redox and lowering DOC).
I, however, do not recommend increasing the amount of water you change per cleaning.
Information resource:
Aquarium Cleaning Frequency
Trim plants of dying, decaying, or algae-covered leaves, even if this removes much of your plants. This is much like pruning in your garden. This forces plants to generate new and healthy leaves that will often do better at competing against the algae.
Algae-Eating Inhabitants
Red Cherry and Amano shrimp (among others) can reduce many types of algae (including BBA). Also, Nerite snails are excellent for many types of algae, including brown algae.
Finally, Oto catfish (a.k.a. Otocinclus) and many different algae-eating fish, such as Bristlenose Plecostomus are excellent for some types of algae.
See the section further below in this article about algae-eaters.
Dip your new (or even established plants - although this will cause a temporary shock to established plants) in Seachem Flourish Excel.
This product can be used as a quick dip solution (about 30 seconds) for plants to kill algae.
I recommend diluting the Excel with about 5 parts water to 1 part Flourish Excel. Be warned, though, I have not established an exact dilution as of yet. So, any feedback from readers is appreciated.
Also, the dosing of Flourish Excel in your aquarium can be effective at algae control. Flourish Excel contains a polymerized isomer of glutaraldehyde trademarked as "polycycloglutaracetal" by Seachem. This is the active ingredient in this product and it is a fertilizer for aquatic plants.
It is claimed that Excel provides a bioavailable source of carbon for higher plants that is not available to algae.
Though not marketed as such due to federal regulations, the algaecidal effect of glutaraldehyde kills most algae at concentrations of 0.5 - 5.0 ppm.
Product resource:
Seachem Flourish Excel - new plant dip, algaecide
Hydrogen peroxide can also be used as a dip/bath (or even added directly to the aquarium). This can be especially effective for the control of BBA (black beard algae) and cyanobacteria.
If you want to add it directly to the tank, my recommended dosage of 2 oz. of 3% hydrogen peroxide per 10 gallons.
However, this is best done without shrimp (such as Cherry shrimp) present, as this may kill them.
Also, many fish are sensitive to hydrogen peroxide, such as Cory and Oto catfish. My preferred use, therefore, is as a dip/bath. Besides fish, Corkscrew Vallisneria are sensitive to peroxide and will be killed if dipped in it.
For plant baths, I would recommend about 4 oz. of 3% hydrogen peroxide for approximately 30 minutes. For a 30 second dip, use about a 5 to 1 solution of hydrogen peroxide applied by basting the plants with the solution. This solution can be increased if results are not satisfactory.
Please see this outside article for more about the use of hydrogen peroxide as an algaecide:
The Krib: hydrogen peroxide as an algae treatment
As well please read this article for about the use and risks of Hydrogen Peroxide:
Aquarium Medications, chemical treatments - Hydrogen Peroxide
If you have any questions or reservations about the use of hydrogen peroxide as a plant dip/bath, etc. for algae, I would recommend using the Flourish Excel mentioned earlier.
Although not as effective for killing algae, it is also much less harsh on certain plants, and, for that matter fish too.
You may find that the simple methods I have outlined here are enough to control your algae. Or, if you need more information, you will find it in this article:
Control of Problem Aquarium Algae; BBA, Hair, Brown Diatom, and more
*Improper GH and KH levels (or mineralization, especially GH).
In an article from the Southern Regional Aquaculture Center, Wurts and Durborow write:
“The release of carbonate converted from bicarbonate by plant life can cause pH to climb dramatically (above 9) during periods of rapid photosynthesis by dense phytoplankton (algal) blooms. This rise in pH can occur in low alkalinity water (20 to 50 mg/L) or in water with moderate to high bicarbonate alkalinity (75 to 200 mg/L) that has less than 25 mg/L hardness.”
Source:
Interactions of pH, Carbon Dioxide, Alkalinity and Hardness in Fish Ponds
*A Poor Redox Balance which is often improved by better and more frequent water changes and proper mineralization such as cations of calcium, magnesium and sodium as stated above.
Also the addition of UV sterilization will improve the Redox Balance as well by affecting the electromagnetism of the water, as killing free-floating algae.
See below for more information.
Further information:
Redox Balance; Potential, Reduction, Oxidation
Aquarium UV Sterilization; Correct UVC Sterilizer Use
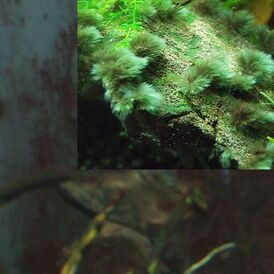
Here is a common algae in aquariums:
Black beard algae is a form of "red algae" in the genus Audouinella that commonly attaches to edges of plant leaves or drift wood and is more common in low CO2 water conditions, that are low in minerals, carbonates, and pH (although these algae will also grow in alkaline, high pH waters as well). As stated above, many good aquatic husbandry methods will aid in combating this algae.
Physically removing rocks and wood that have these algae on it and scrubbing the algae off will also give plants a better chance of utilizing nutrients and overcoming these algae.
The use of Seachem Flourish Excel (link above) has, for some hobbyists, been shown to be effective in control of this algae. The reason behind this is that the Flourish Excel formula is aldehyde-based. Aldehydes react with
oxidation which is another indicator of the importance of VERY regular but often small water changes (as much as 5-10% per day) to bring about a healthy redox potential (among other methods of redox control).
This, admittedly, is only a theory at this point. However, I have observed vastly better algae control (in all sorts of algae) in ponds where the redox is stable.
Further information:
*Medical Management Guidelines for Formaldehyde - oxidation information
I will finally add that most true algae (not cyanobacteria) compete with plants for the same nutrients and light, so battling algae is often very difficult.
However from my experience, with ponds in particular, it is often a war that cannot be totally won. It, can, though, be checked by keeping nutrients away from algae (such as substrate nutrients) while providing them to plants.
You should also understand that algae are more simple life forms than plants and have less complicated needs. So, addressing the more complex needs of higher plants will allow them to out compete the algae.
Sometimes this is as simple as the removal of as much algae as possible to give the plants a foot hold. Admittedly,this can also be easier said than done.
For further reading on the topic of algae, please see this Aquarium Answers article (post):
“Aquarium Answers: Aquatic Algae - Green Algae, Brown, Black Beard Algae”
Oto Catfish
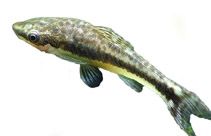
This popular, non-destructive, algae-eating catfish usually mixes well in a planted community tank. Oto catfish tolerate a wide pH range of 5.2-7.5 and prefer a temperature between 68 to 82 F (20- 28 C). Otos grow to 1.5” (4 cm).
Otos will eat most kinds of algae, especially green and brown (diatoms). If you do not have algae in your tank, you must supplement their diet with algae wafers or, for example, blanched vegetables (cucumbers are said to work).
Unfortunately, Otos frequently die within the first couple of weeks in the home aquarium. Some speculate that it is because they are very fragile, but others think it may have more to do with the way they are caught in the wild. Most Otos in stores are wild-caught. Luckily, reports are that if your Oto makes it past the first couple of weeks, they will live for several years.
I should note that I do NOT recommend Plecos in planted aquariums, especially the larger species. These fish are often hard on plants and are prone to uprooting them. Also some, like the common Plecostomus, can easily grow to 12 inches or longer.
Shrimp
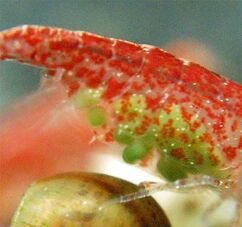
The Red Cherry Shrimp is popular in the aquarium hobby.
Picture is of a "berried" female carrying eggs.
This is one of the better fresh water algae-eating shrimps.
Red Cherry Shrimp are fairly easy to care for. As with most shrimp, they are very sensitive to ammonia and nitrite, so it is of great importance that the aquarium they are in has been established and cycled for a while.
They prefer water around 70°F-80°F, but it is reported that they can survive in water as cold as 50°F (not recommended).
Most pH ranges suitable for aquarium fish will also work well for the Red Cherry Shrimp.
For more Cherry Shrimp information, I recommend reading this article:
Cherry Shrimp - Neocaridina denticulata sinensis
Snails
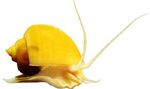
Apple snails can live together with most fish species and they can be used to keep the aquarium clean of algae. Not all apple snail species are a good choice for aquaria, as their voracious appetite for aquatic vegetation will often result in your aquatic plants being decimated.
A better choice for planted tanks: Nerite Snails
Nerite snails are an easy snail to keep. I would recommend you keep them in water with a pH above 7.0. A GH over 150 ppm is best for these snails because these are snails that breed in marine or brackish water (Wonder Shells are good for this). Even if these snails lay eggs in your freshwater tank, they will not hatch unless you provide brackish or marine water. This keeps these snails from overpopulating your tank, a real problem with, for example, common pond snails. Nerite snails almost exclusively eat algae and do not seem to harm plants at all. They can clean up very heavy algae growths in a month or two.
Product resource:
*Wonder Shells - aquarium mineral block only from AAP
For more about snail identification, please see this site:
Various Freshwater Snails
Summary
As noted in the "Overview" section of this article, plant care is not my aquarium specialty, but I still have kept many planted aquarium tanks for my clients over the years, primarily low to medium tech, but still many high tech as well.
My expertise is more in aquarium electrolytes, aquarium Redox, UV sterilization, filtration, fish diseases, and fish disease prevention. So when those in the hobby or planted aquarium forums poo-poo my experience in these fields (as in my extensive Redox research) to discredit me here, I would be wary.
Further information:
The Effect of Redox Balance, Reduction, and Potential in Aquariums
Please be careful when you get anecdotal and/or trendy advice as to the care of aquatic plants. This is an area of aquarium keeping (along with reef keeping) that has a lot of advice floating around that is based more on opinion than facts or true research.
This is not to say that this article is the authority on the only way to keep plants, far from it!
This is my point! There are many successful ways of keeping aquarium plants.
It can be equal parts art and science. Just be careful when you read statements that are dogmatic or forums or groups that use logical fallacies to attack others or even ban members when they do not agree rather than welcoming open debate.
A good example is "High-Tech Planted Tanks" (https://www.facebook.com/groups/259927137681824/) which is run by an admin that does not welcome good science or debate as well as does not support those who support this hobby or industry.
Moving on and as a side note, nitrifying bacterial cultures do NOT survive in liquid form at room temperatures well at all.
This explains why I know more in the Aquarium Service community that use products such as Flourite over Eco-Complete.
This added Heterotrophic bacteria to Eco-Complete is an unneeded gimmick (To be clear, the "complete" statement itself is anecdotal, based on my, and others in the aquarium service communities, experience).
ALSO as to CO2 or carbon: this is ONLY ONE ingredient in healthy plant growth (and algae control as well). This point is often missed.
Even well funded studies of terrestrial plants have shown that added CO2 will not increase plant growth without proper nutrients (hence the popularity of the EI method of dosing), substrate, and light (the importance of and what constitutes good aquarium lighting is often misunderstood).
Further information:
Aquarium Lighting
FURTHER READING:
Here is an excellent article about a CO2 drop checker:
*The Drop Checker by Walter Reed
Here is an older but experienced article about the balance of light, CO2, & Ferts (including how it is possible to have a nice planted aquarium without supplemental CO2):
The Krib: Balancing Lights, CO2 and Fertilization
An overview of balancing light & CO2 by planted aquarium Guru Takashi Amano
Balancing Light and CO2 in the Nature Aquarium
Recommended Forum for Plant Keepers:
Everything Aquatic: Aquarium and Pond forum and article updates
Here is an interesting blog I recommend reading:
Aquatic Eden
Another excellent resource (I do not agree with 100% of the conclusions, but this is a well written and educational article):
www.aquaticplantcentral.com/forumapc/lighting/38014-lighting-spectrum-photosythesis.html
Videos
|
|
|
|